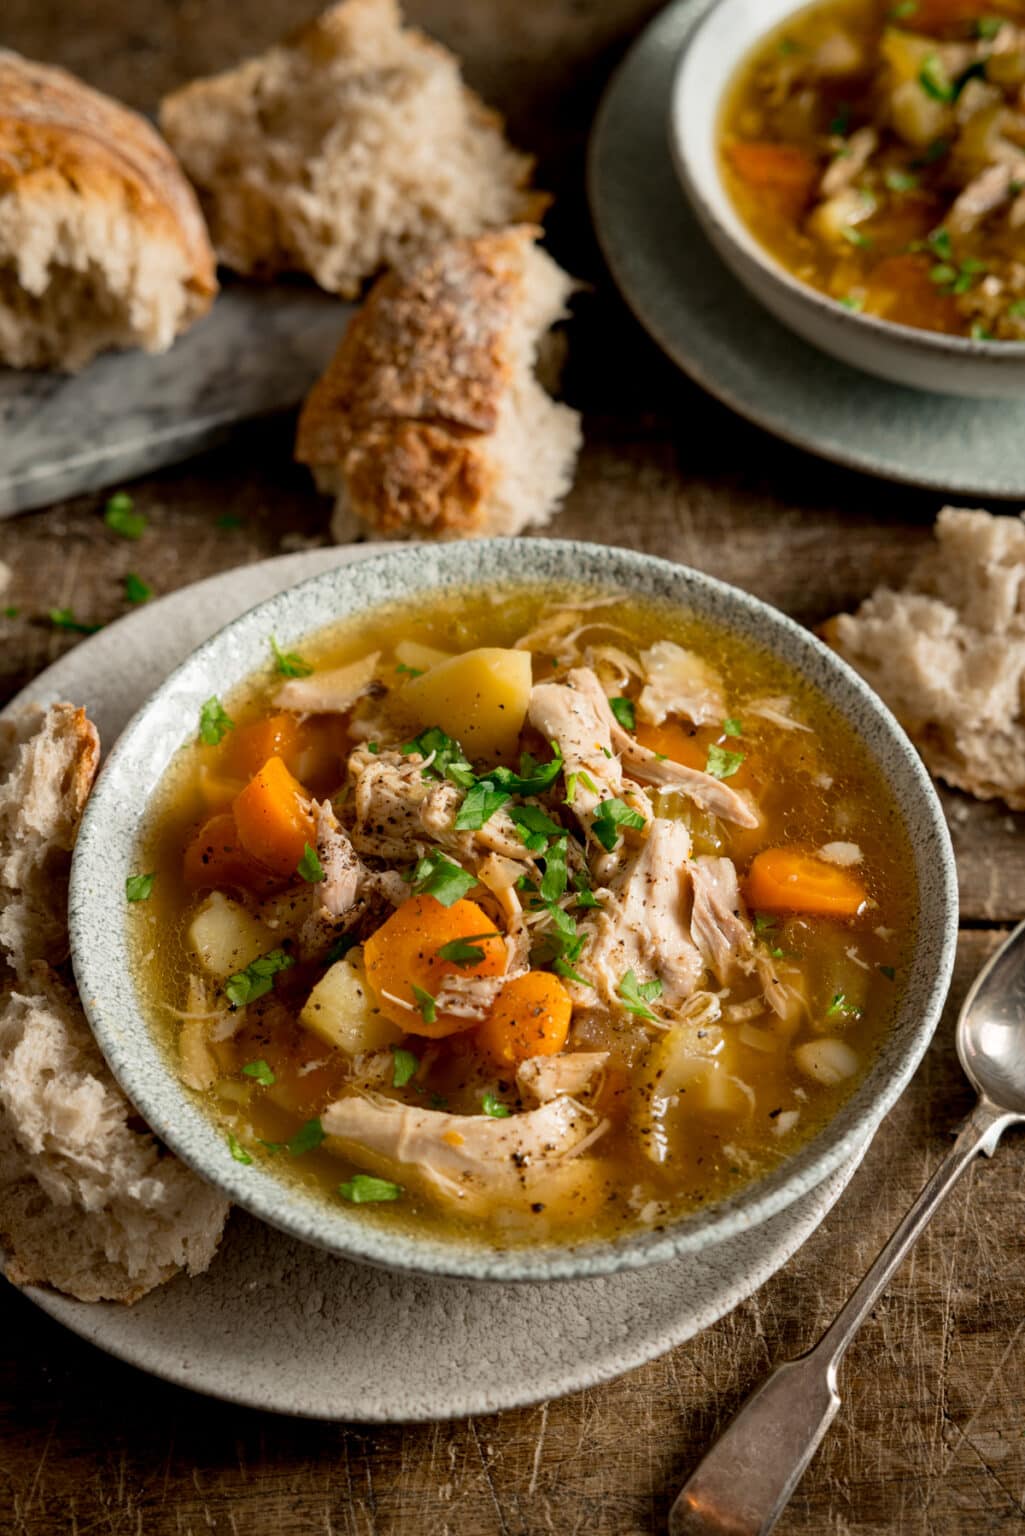
Winter is here, and nothing beats a hot bowl of chicken soup to soothe your soul and keep you cozy. Whether you prefer a classic chicken and vegetable soup, a hearty chicken and lentil soup, a creamy chicken and tortellini soup, or a cheesy white lasagna soup, I have you covered with these four amazing recipes that are easy to make and full of flavor.
This is a simple and satisfying soup that you can make in your slow cooker with minimal prep. Just toss in some chicken, vegetables, broth, and herbs, and let it cook for hours until the chicken is tender and the soup is rich and comforting. You can customize it with your favorite veggies and seasonings, and enjoy it with some crusty bread or biscuits.
This is a hearty and healthy soup that is packed with protein and fiber from the chicken and lentils. It also has a wonderful aroma and flavor from the onion, garlic, bay leaf, and thyme. You can make it on the stovetop or in the pressure cooker, and it freezes well for later. It’s a great way to use up leftover chicken or rotisserie chicken, and it’s perfect for a filling lunch or dinner.
This is a creamy and delicious soup that is loaded with chicken, cheese tortellini, spinach, and carrots. It’s easy to make in one pot, and it’s ready in less than 30 minutes. You can use fresh or frozen tortellini, and adjust the creaminess to your liking. It’s a cozy and comforting soup that the whole family will love.
This is a cheesy and decadent soup that tastes like lasagna in a bowl. It has layers of chicken, noodles, cheese, and spinach, all simmered in a creamy and flavorful broth. It’s a one-pot wonder that is sure to impress your guests and satisfy your cravings. You can use any kind of noodles you like, and add more cheese if you want. It’s a rich and indulgent soup that is perfect for a special occasion.
I hope you enjoyed these four chicken soup recipes, and I hope you try them out this winter. Want to enjoy hot, fresh meals on the go? Learn how to choose and use an electric lunch box with this handy guide. Click here and get ready to savor!
Fried rice is one of the most popular and versatile dishes in the world. It is a great way to use up leftover rice and vegetables, and it can be customized to your taste and preference. Whether you like it spicy, savory, or sweet, there is a fried rice recipe for you.
In this blog post, I will share with you four easy and delicious fried rice recipes that you can make at home. These recipes are inspired by different cuisines and flavors, and they are all simple and quick to prepare. You will need a large skillet or wok, some cooked rice, eggs, oil, and some seasonings and sauces. You can also add any vegetables, meat, or seafood that you like.
Do you want to enjoy hot and fresh meals anywhere you go? Learn how to choose and use an electric lunch box with this comprehensive guide. Click here to read more! 👉
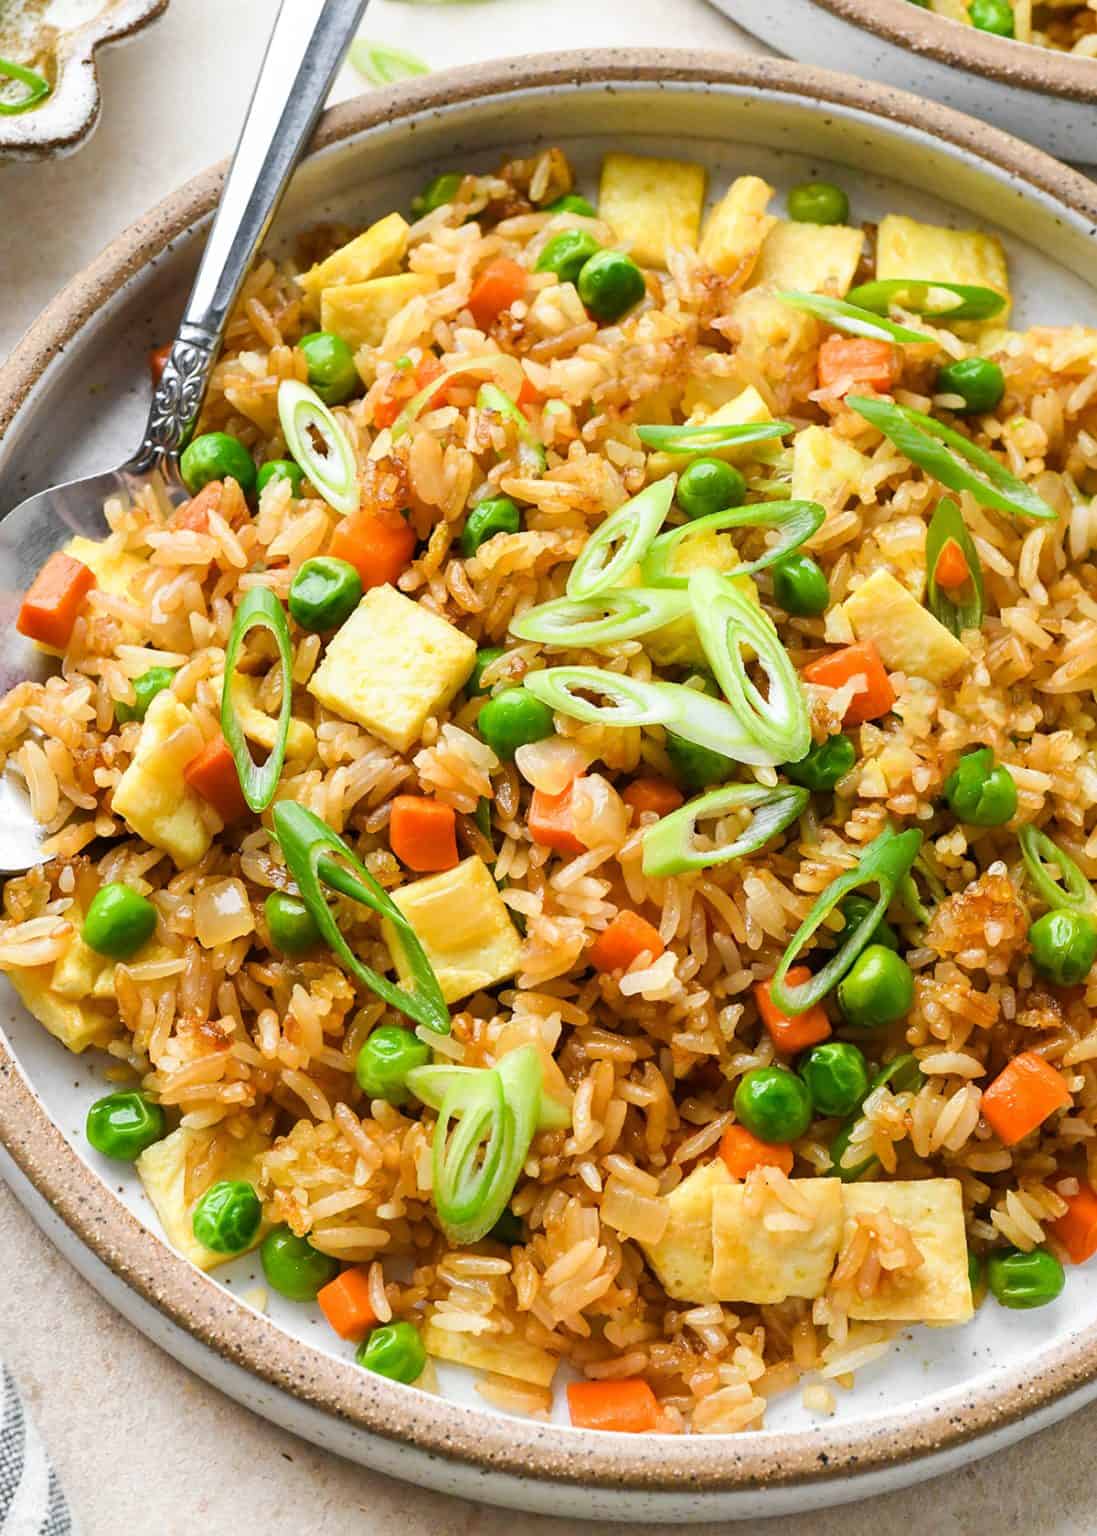
This recipe is from JoyFoodSunshine, and it is a classic vegetable fried rice that is loaded with flavor and nutrition. It is vegan, gluten-free, and dairy-free, and it can be easily adapted to your dietary needs. You can use brown rice, white rice, or even cauliflower rice for this recipe. You can also add any protein of your choice, such as chicken, beef, tofu, or shrimp.
The secret to making this fried rice is to use cold, cooked rice that has been refrigerated overnight. This will prevent the rice from sticking together and becoming mushy. You will also need some sesame oil, soy sauce, rice vinegar, garlic, ginger, green onions, carrots, peas, and corn. You will start by scrambling some eggs in a skillet, then setting them aside. Then, you will heat some oil and sauté the garlic, ginger, and green onions until fragrant. Next, you will add the rice and stir-fry it until it is hot and slightly crispy. Finally, you will add the soy sauce, rice vinegar, sesame oil, and the vegetables and eggs, and toss everything together until well combined.
This fried rice is so easy and delicious, you will never order takeout again!
This recipe is from SavorySweetSpoon, and it is a spicy and flavorful fried rice that is inspired by the Thai cuisine. It is made with jasmine rice, eggs, chicken, onion, garlic, Thai chili, fish sauce, oyster sauce, sugar, lime juice, and cilantro. You can also add any other vegetables that you like, such as bell peppers, carrots, or broccoli.
The key to making this fried rice is to use a high heat and a large skillet or wok, so that the rice can get crispy and charred. You will also need to cook the ingredients in batches, so that they don’t overcrowd the pan and steam instead of fry. You will start by heating some oil and frying the eggs until they are set, then breaking them into small pieces and setting them aside. Then, you will heat some more oil and cook the chicken until golden and cooked through, then setting it aside as well. Next, you will heat some more oil and sauté the onion, garlic, and chili until soft and aromatic. Then, you will add the rice and stir-fry it until it is hot and crispy. Finally, you will add the fish sauce, oyster sauce, sugar, lime juice, cilantro, and the chicken and eggs, and mix everything well.
This fried rice is spicy, tangy, and satisfying, and it goes well with some cucumber slices and lime wedges.
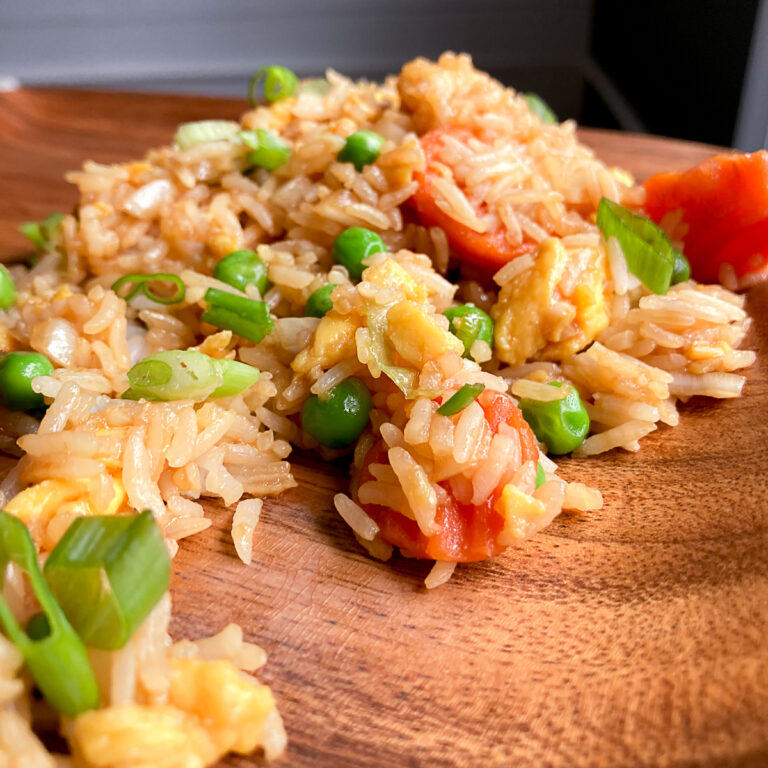
This recipe is from MyLifeAndKids, and it is a copycat of the famous Panda Express fried rice that is loved by many. It is made with long-grain white rice, eggs, green onions, peas, carrots, soy sauce, and sesame oil. It is simple, tasty, and kid-friendly, and it can be served as a side dish or a main course.
The trick to making this fried rice is to use a large skillet or wok that is very hot, so that the rice can get crispy and not soggy. You will also need to use cold, cooked rice that has been refrigerated overnight, so that it is dry and separated. You will start by heating some oil and scrambling some eggs in a skillet, then setting them aside. Then, you will heat some more oil and sauté the green onions until soft. Next, you will add the rice and stir-fry it until it is hot and slightly browned. Finally, you will add the soy sauce, sesame oil, peas, carrots, and eggs, and toss everything together until well coated.
This fried rice is simple, hearty, and delicious, and it tastes just like the Panda Express version!
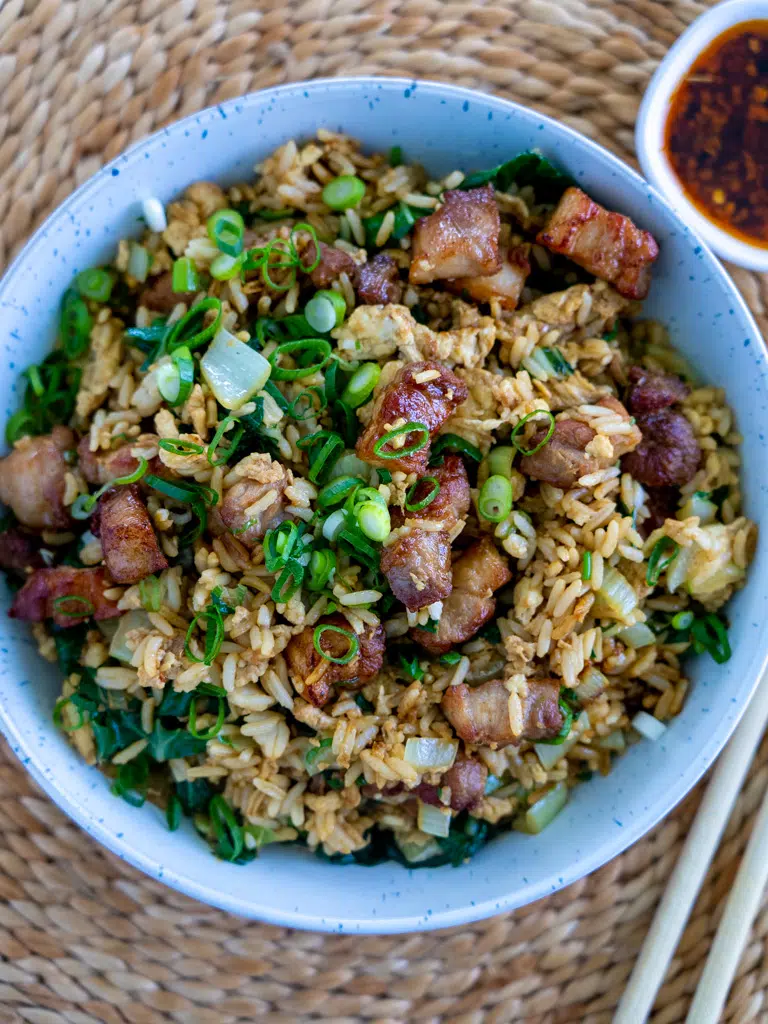
This recipe is from SimpleHomeEdit, and it is a rich and indulgent fried rice that is made with pork belly, eggs, onion, garlic, ginger, soy sauce, sugar, vinegar, and green onions. It is a perfect way to use up any leftover pork belly that you have, and it can be enjoyed as a main dish or a side dish.
The secret to making this fried rice is to use a cast iron skillet or a non-stick pan, so that the pork belly can render its fat and crisp up. You will also need to use cold, cooked rice that has been refrigerated overnight, so that it is dry and separated. You will start by cutting the pork belly into small pieces and frying them in a skillet until they are crispy and golden, then draining them on a paper towel and setting them aside. Then, you will heat some oil and scramble some eggs in the same skillet, then setting them aside as well. Next, you will heat some more oil and sauté the onion, garlic, and ginger until soft and fragrant. Then, you will add the rice and stir-fry it until it is hot and slightly charred. Finally, you will add the soy sauce, sugar, vinegar, green onions, and the pork belly and eggs, and stir everything well.
This fried rice is rich, savory, and satisfying, and it is a great way to enjoy pork belly in a different way.
Click here
I hope you enjoyed these four easy and delicious fried rice recipes that you can make at home. They are all different and unique, and they are all perfect for any occasion. You can also experiment with different ingredients and sauces, and create your own fried rice variations.
If you want to enjoy a warm and delicious meal at work or school, you need to read this guide on how to choose the best electric lunch box for your needs. Click here to find out more! 👇Thank you for reading, and happy cooking! 😊
Rice is one of the most versatile and satisfying grains you can cook with. It can be fluffy, creamy, crunchy, or sticky, depending on how you prepare it. It can also be paired with a variety of ingredients and flavors, from spicy kimchi to creamy cauliflower. In this post, I will share with you four delicious and easy rice recipes that you can make in less than 30 minutes. Whether you are looking for a vegan, keto, or gluten-free option, there is something for everyone in this list.
Do you want to enjoy hot and fresh meals anywhere you go? Learn how to choose and use an electric lunch box with this comprehensive guide. Click here to read more! 👉
Kimchi fried rice is a popular Korean dish that is spicy, tangy, and savory. It is a great way to use up leftover rice and kimchi, as well as any other vegetables or proteins you have on hand. This recipe from Live Eat Learn is super simple and quick, requiring only 15 minutes and a few ingredients. This kimchi fried rice is a perfect meal for busy weeknights, as it is filling, flavorful, and easy to customize. You can also make it vegan by omitting the egg and using vegan kimchi.
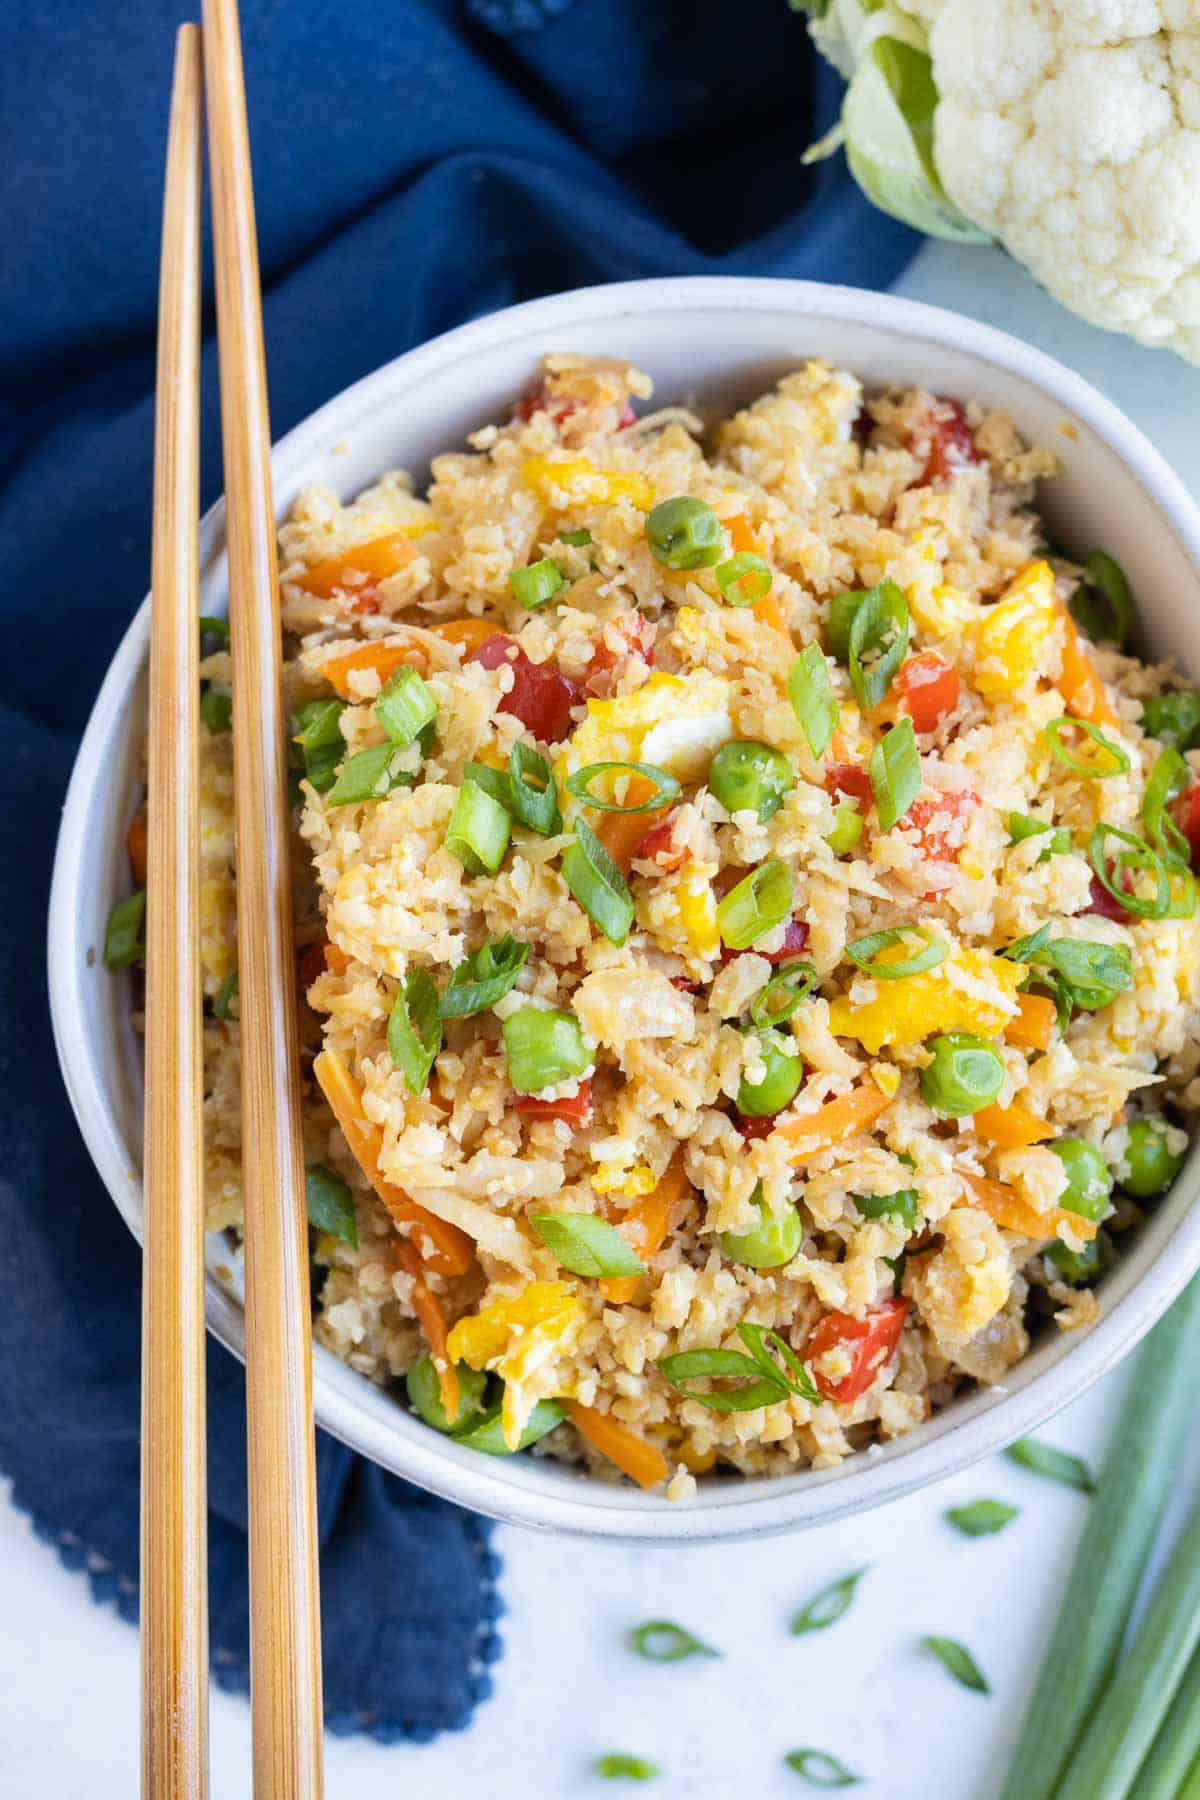
If you are following a vegan or keto diet, you might think that rice is off-limits. But don’t worry, you can still enjoy a delicious fried rice dish with cauliflower instead of rice. Cauliflower is a low-carb and high-fiber vegetable that can mimic the texture and taste of rice when grated or processed. This recipe from I Eat Keto shows you how to make a vegan keto cauliflower fried rice that is loaded with veggies and protein. This vegan keto cauliflower fried rice is a great way to get more vegetables and protein in your diet, as well as satisfy your cravings for rice. You can also swap the tofu for any other vegan protein of your choice, such as tempeh, seitan, or edamame.
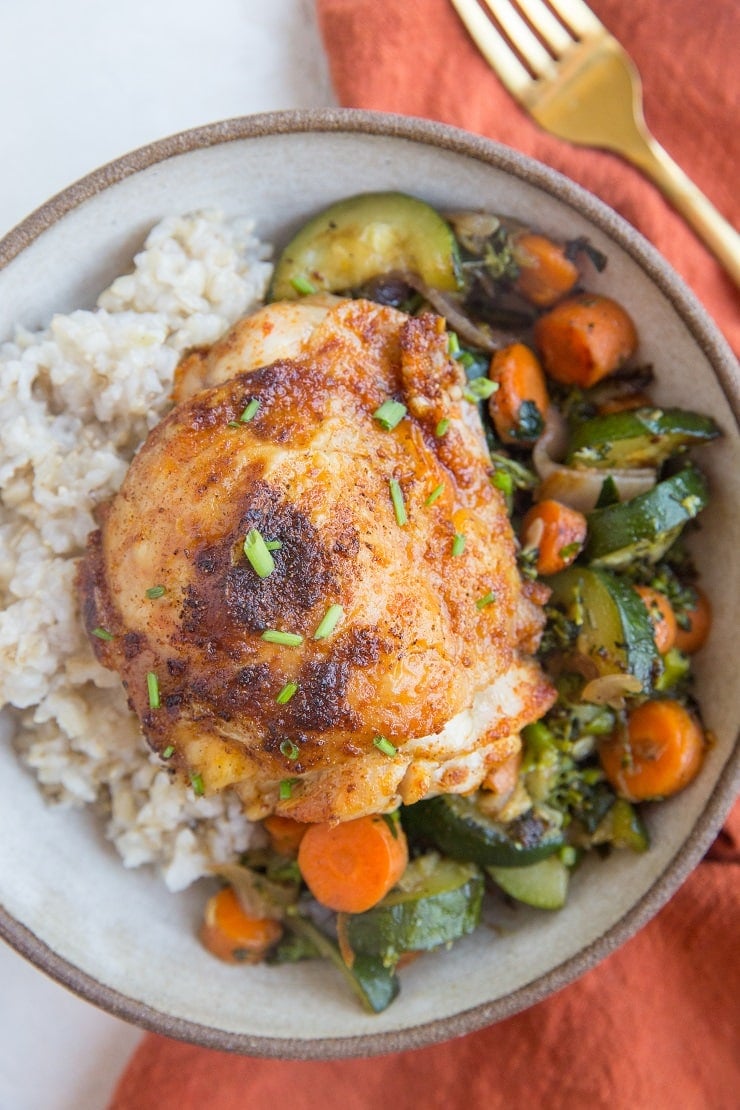
Did you know that you can make a complete meal in your rice cooker? Yes, you heard that right. You can cook rice and other ingredients at the same time, saving you time and dishes. This recipe from Life Currents shows you how to make a rice cooker meal with chicken, broccoli, and cheese. This rice cooker meal is a convenient and comforting dish that you can make with minimal effort and cleanup. You can also vary the ingredients according to your preferences, such as using different types of cheese, vegetables, or meat.
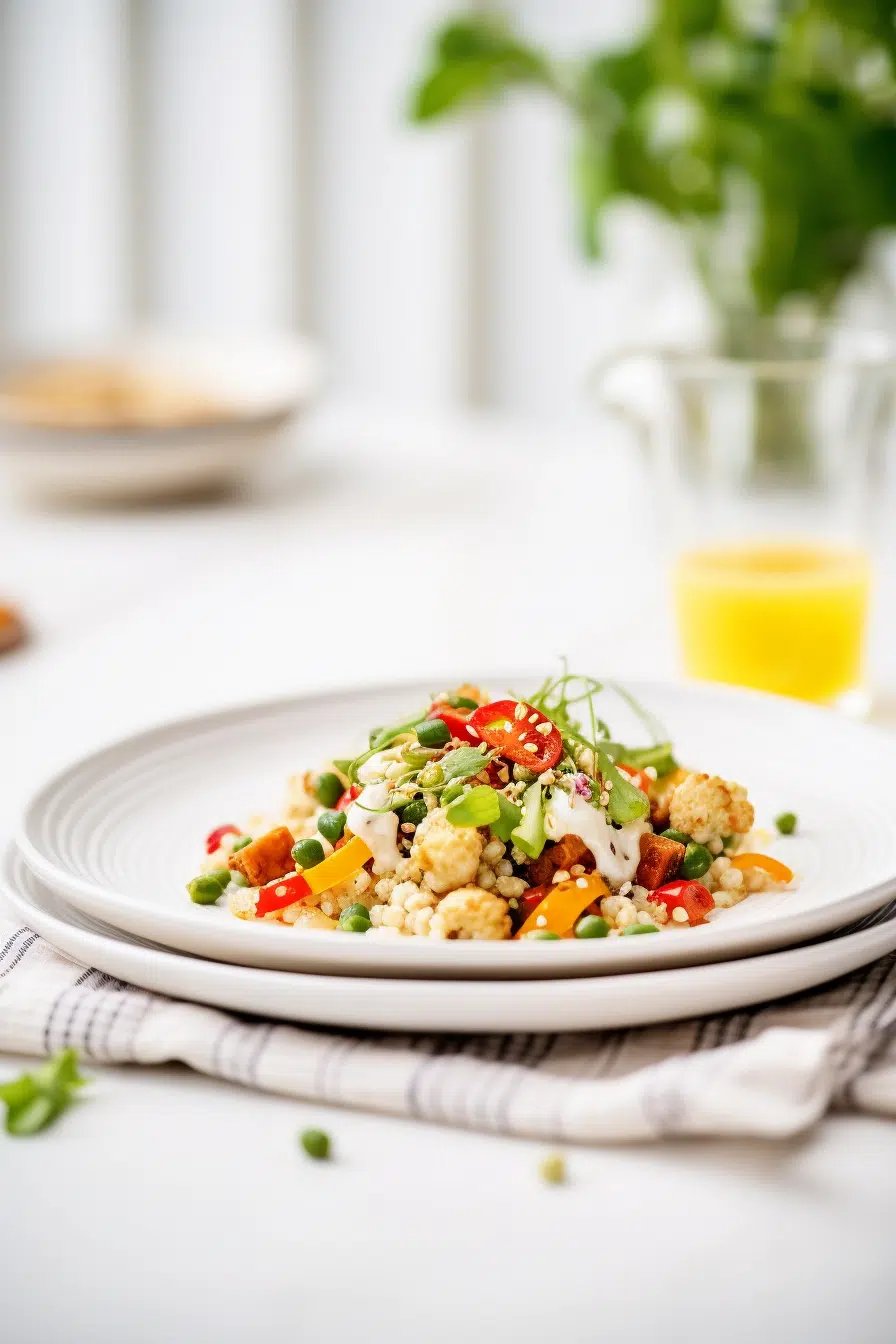
Another way to use cauliflower rice is to make a stir-fry with it. This recipe from Evolving Table is a healthy and delicious alternative to regular rice stir-fry, as it is low-carb, gluten-free, and dairy-free. It is also packed with vegetables and chicken, making it a balanced and satisfying meal. This cauliflower rice stir-fry is a light and tasty dish that you can make in less than 30 minutes. You can also make it vegan by replacing the chicken with tofu or mushrooms, and the honey with maple syrup or agave nectar.
I hope you enjoyed these four delicious and easy rice recipes. If you want to enjoy a warm and delicious meal at work or school, you need to read this guide on how to choose the best electric lunch box for your needs. Click here to find out more! 👇Thank you for reading, and happy cooking! 😊
If you love chicken, but want to avoid the hassle and mess of deep frying, then you need to try these amazing air fryer chicken recipes. Air frying is a fast and easy way to cook chicken that results in crispy, juicy, and tender meat. You can make a variety of dishes with air fryer chicken, from kabobs to meatballs, and enjoy them with your favorite sauces and sides. In this blog post, I will share with you five of the best air fryer chicken recipes that you can make in minutes. These recipes are simple, flavorful, and perfect for any occasion. Let’s get started!
EASY AIR FRYER CHICKEN KABOBS
These air fryer chicken kabobs are a great appetizer or main course that you can customize with your favorite vegetables and seasonings. They are easy to make, and you only need a few ingredients. You can serve them with rice, salad, or pita bread. Here is how to make them:
Cut 1 pound of boneless, skinless chicken breasts into 1-inch pieces and season with salt, pepper, garlic powder, and paprika.
Cut 1 red onion, 1 green bell pepper, and 8 ounces of mushrooms into similar-sized pieces.
Thread the chicken and vegetables onto 8 metal or wooden skewers. If using wooden skewers, soak them in water for 30 minutes before using.
Preheat your air fryer to 400°F and spray the basket with cooking spray.
Place the kabobs in a single layer in the basket and cook for 15 minutes, turning halfway through, until the chicken is cooked through and the vegetables are tender.
Enjoy with your favorite sauce, such as barbecue, teriyaki, or tzatziki.
These air fryer crispy chicken thighs are a delicious and healthy alternative to fried chicken. They are crispy on the outside and juicy on the inside, and they only require four ingredients. You can season them with your favorite spices, such as cumin, curry, or cayenne. Here is how to make them:
Pat dry 4 bone-in, skin-on chicken thighs with paper towels and season with salt and pepper.
Preheat your air fryer to 375°F and spray the basket with cooking spray.
Place the chicken thighs skin-side down in the basket and cook for 20 minutes, flipping halfway through, until the skin is golden and crisp and the meat is cooked through.
Enjoy with your favorite side dish, such as mashed potatoes, roasted vegetables, or coleslaw.
These air fryer chicken meatballs are a great way to use ground chicken, and they are so easy to make. They are moist, tender, and flavorful, and they don’t require any eggs or breadcrumbs. You can make them with any herbs and spices you like, such as parsley, basil, or oregano. Here is how to make them:
In a large bowl, combine 1 pound of ground chicken, 1/4 cup of grated Parmesan cheese, 2 tablespoons of chopped fresh parsley, 2 teaspoons of minced garlic, 1 teaspoon of salt, and 1/2 teaspoon of black pepper.
Mix well and shape into 16 meatballs, about 1 1/2 inches each.
Preheat your air fryer to 375°F and spray the basket with cooking spray.
Place the meatballs in a single layer in the basket and cook for 12 minutes, turning halfway through, until golden and cooked through.
Enjoy with your favorite sauce, such as marinara, pesto, or alfredo.
These air fryer chicken thighs are a simple and tasty way to cook chicken without any oil or butter. They are seasoned with a homemade spice blend that gives them a nice flavor and color. You can adjust the spices to your liking, such as adding more or less salt, paprika, or garlic powder. Here is how to make them:
In a small bowl, whisk together 1 teaspoon of salt, 1/2 teaspoon of paprika, 1/4 teaspoon of garlic powder, 1/4 teaspoon of onion powder, 1/4 teaspoon of black pepper, and 1/4 teaspoon of dried thyme.
Pat dry 4 boneless, skinless chicken thighs with paper towels and rub the spice mixture all over them.
Preheat your air fryer to 400°F and spray the basket with cooking spray.
Place the chicken thighs in a single layer in the basket and cook for 18 minutes, flipping halfway through, until the chicken is cooked through and the juices run clear.
As you can see, air frying is a great way to make delicious and healthy chicken recipes in minutes. You can use your air fryer to make a variety of dishes, from kabobs to meatballs, and enjoy them with your favorite sauces and sides. Air frying is also a convenient and easy way to cook chicken, as it requires minimal preparation and cleanup. I hope you enjoyed this blog post and found some new air fryer chicken recipes to try. Thank you for reading!
If you love coffee, tea, or hot chocolate, you might want to invest in a milk frother. A milk frother is a device that whips milk into a creamy foam, adding texture and flavor to your drinks. You can use it to make lattes, cappuccinos, macchiatos, and more. In this blog post, I will show you some easy and tasty recipes that you can make with a milk frother, as well as some tips on how to choose the best one for your needs.
Why You Need a Milk Frother
A milk frother can elevate your drinks from ordinary to extraordinary. Here are some benefits of using a milk frother:
It adds richness and sweetness to your drinks, without adding extra sugar or calories.
It creates a smooth and velvety texture that enhances the mouthfeel and taste of your drinks.
It allows you to customize your drinks according to your preferences. You can choose the type of milk, the amount of foam, and the flavorings that you like.
It saves you money and time. You don’t need to go to a coffee shop to enjoy a frothy drink. You can make it at home with a simple push of a button.
How to Use a Milk Frother
Using a milk frother is very easy. Here are the basic steps:
Fill a mug with your desired drink, such as coffee, tea, or hot chocolate. Leave some room for the milk foam.
Fill the milk frother with cold or warm milk, up to the max line. You can use any kind of milk, such as cow’s milk, almond milk, soy milk, or oat milk.
Turn on the milk frother and wait for a few seconds until it stops automatically. The milk will be whipped into a thick and fluffy foam.
Pour the milk foam over your drink and enjoy. You can also add some toppings, such as cinnamon, nutmeg, cocoa powder, or whipped cream.
Some Delicious Recipes to Try
Here are some recipes that you can try with your milk frother. They are easy to make and taste amazing.
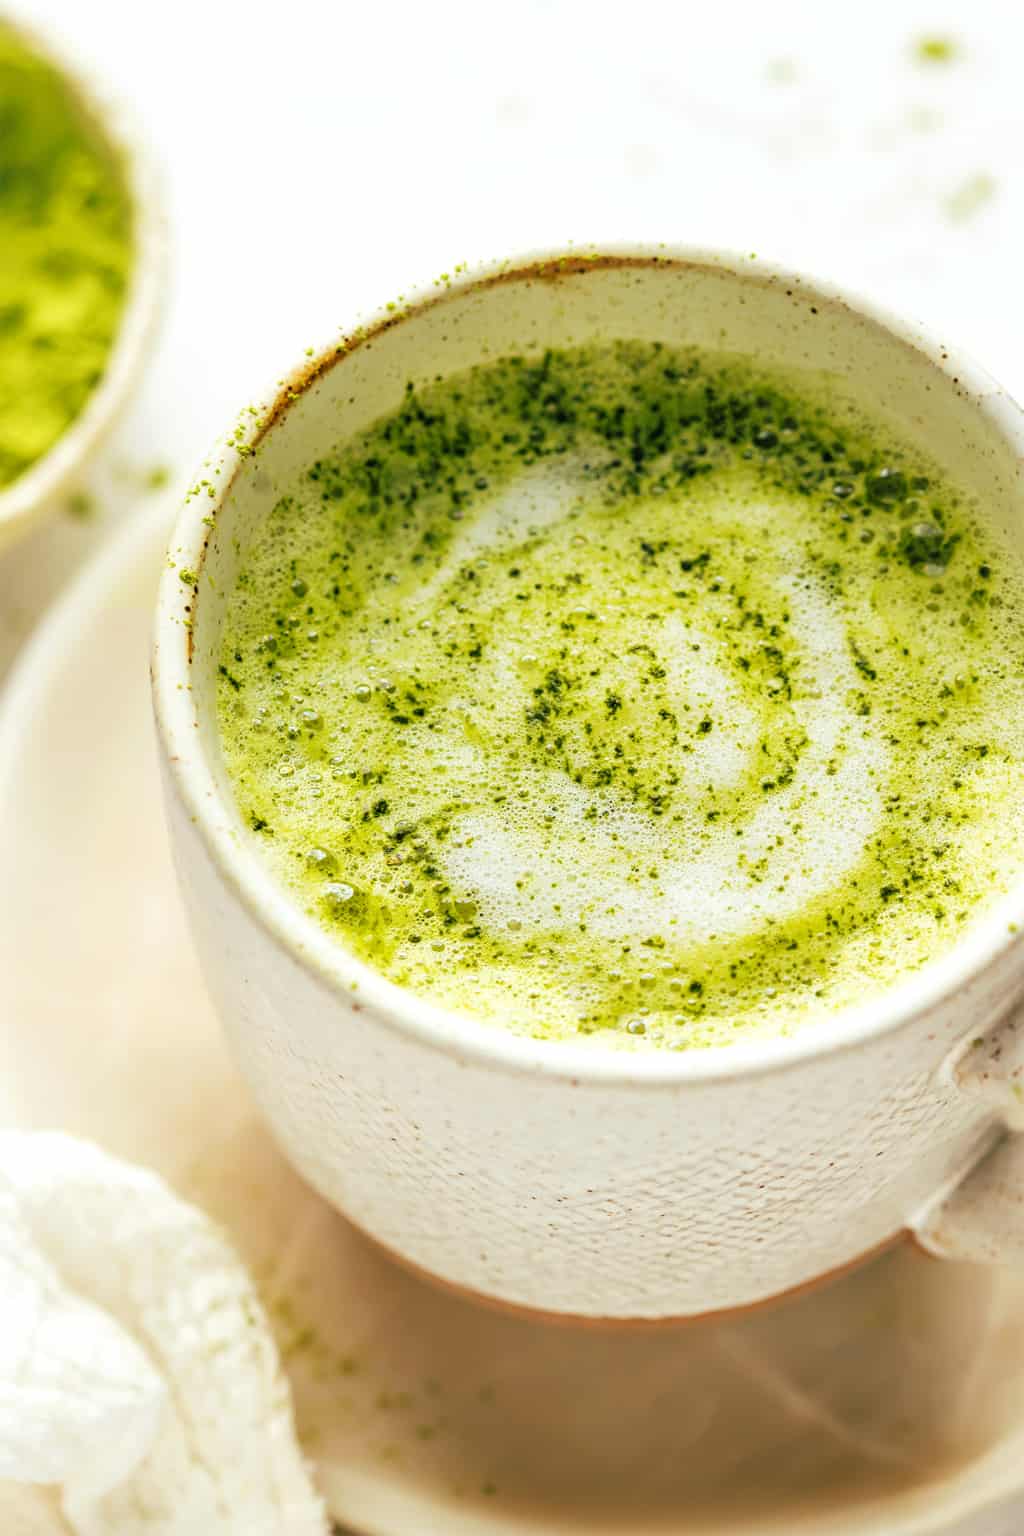
This is a refreshing and healthy drink that is popular in Japan. It uses matcha powder, which is a finely ground green tea that has many antioxidants and health benefits.
Ingredients:
1 cup of hot water
1 teaspoon of matcha powder
1/4 cup of milk
1 tablespoon of honey or sugar
Whipped cream for topping
Directions:
Boil a cup of water and pour it into a mug.
Add the matcha powder and whisk it with a bamboo whisk or a spoon until dissolved.
In a small saucepan, heat the milk and honey or sugar over low-medium heat, stirring occasionally, until well combined.
Pour the milk mixture into the milk frother and turn it on.
When the milk is frothed, pour it over the matcha and stir gently.
Top with whipped cream.
How to Choose the Best Milk Frother
There are many types of milk frothers available on the market, but not all of them are created equal. Here are some factors to consider when choosing the best milk frother for your needs:
The size and capacity. You want a milk frother that can fit your counter space and can froth enough milk for your drinks. Some milk frothers can only froth a small amount of milk at a time, while others can froth up to a cup or more.
The speed and ease of use. You want a milk frother that can froth your milk quickly and easily, without requiring too much effort or skill. Some milk frothers can froth your milk in seconds, while others can take minutes or require manual pumping.
The quality and durability. You want a milk frother that can produce a consistent and smooth foam, without leaving any lumps or bubbles. You also want a milk frother that can last for a long time, without breaking down or malfunctioning.
The price and value. You want a milk frother that can fit your budget and offer a good value for your money. Some milk frothers are very cheap, but they may not work well or last long. Some milk frothers are very expensive, but they may have extra features or functions that you don’t need.
Some Recommendations to Consider
Here are some recommendations of milk frothers that I think are worth considering. They are based on the factors mentioned above, as well as the customer reviews and ratings. I have also included some links where you can learn more about them or buy them online.
Zulay Kitchen Milk Frother Handheld
This is a handheld milk frother that is very easy to use and affordable. It can froth your milk in seconds, with a simple push of a button. It can also froth any type of milk, hot or cold. It has a stainless steel whisk and a ergonomic handle, making it durable and comfortable to hold. It is also battery-operated, so you don’t need to worry about cords or outlets. It comes in various colors and has a lifetime warranty.
This is another handheld milk frother that is very easy to use and affordable. It can froth your milk in 15-20 seconds, with a simple push of a button. It can also froth any type of milk, hot or cold. It has a stainless steel whisk and a soft-touch handle, making it durable and comfortable to hold. It is also battery-operated, so you don’t need to worry about cords or outlets. It comes with a stand and a cleaning brush, making it easy to store and clean. It has a 100% lifetime warranty.
This is a handheld milk frother that is very easy to use and affordable. It can froth your milk in 15-20 seconds, with a simple push of a button. It can also froth any type of milk, hot or cold. It has a stainless steel whisk and a ergonomic handle, making it durable and comfortable to hold. It is also battery-operated, so you don’t need to worry about cords or outlets. It comes with a stand and a cleaning brush, making it easy to store and clean. It has a one-year warranty.
This is a handheld milk frother that is very easy to use and affordable. It can froth your milk in 15-20 seconds, with a simple push of a button. It can also froth any type of milk, hot or cold. It has a stainless steel whisk and a soft-touch handle, making it durable and comfortable to hold. It is also battery-operated, so you don’t need to worry about cords or outlets. It comes with a stand and a cleaning brush, making it easy to store and clean. It has a 90-day money-back guarantee and a 24-month warranty.
A milk frother is a great device that can help you make delicious drinks at home. You can use it to make lattes, cappuccinos, macchiatos, and more. You can also experiment with different types of milk, flavors, and toppings. In this blog post, I showed you some easy and tasty recipes that you can try with a milk frother, as well as some tips on how to choose the best one for your needs. I hope you found this guide helpful and enjoyable. If you have any questions or comments, please feel free to leave them below. Thank you for reading and happy frothing!
This post may contain affiliate links, which means I will earn a small commission if you purchase through my links at no extra cost to you.
Do you love crispy, crunchy, and delicious food, but want to avoid the excess oil and calories of deep frying? If so, you might want to try air frying, a cooking method that uses hot air to cook food evenly and quickly, with little or no oil. Air frying can help you make healthier versions of your favorite fried foods, such as chicken nuggets, fries, onion rings, and more. You can also use an air fryer to make other dishes, such as roasted vegetables, baked goods, and even desserts. In this guide, we will show you how to use an air fryer, share some tips and tricks to get the best results, and recommend some of the best air fryers on the market. We will also give you some recipes to try, featuring some of the images and links you provided.
How to Use an Air Fryer
An air fryer is a kitchen appliance that works like a mini convection oven. It has a heating element and a fan that circulates hot air around the food, creating a crispy and browned exterior, while keeping the inside moist and tender. To use an air fryer, you need to follow these basic steps:
Preheat the air fryer. Most air fryers require preheating for a few minutes before adding the food. This helps the food cook faster and more evenly.
Prepare the food. Cut the food into bite-sized pieces, season it with salt, pepper, and other spices, and coat it lightly with oil or cooking spray. You can also use a batter or a breadcrumb mixture for extra crunch. Make sure the food is dry and not too wet, as excess moisture can cause splattering and steam, which can affect the crispiness.
Place the food in the air fryer basket. Arrange the food in a single layer, leaving some space between the pieces for air circulation. Do not overcrowd the basket, as this can reduce the airflow and result in uneven cooking. You may need to cook the food in batches, depending on the size of your air fryer and the amount of food.
Set the time and temperature. Depending on the type and thickness of the food, you may need to adjust the time and temperature settings of your air fryer. Generally, air frying takes less time and higher temperature than conventional oven baking. You can refer to the manual of your air fryer or use a recipe for guidance. You can also check the food halfway through the cooking process and flip or shake it for even browning.
Enjoy your air-fried food. Once the food is done, carefully remove it from the air fryer basket and transfer it to a plate or a cooling rack. You can serve it hot or at room temperature, with your favorite dips or sauces.
Tips and Tricks for Air Frying
To get the most out of your air fryer, here are some tips and tricks that you can follow:
Use the right amount of oil. While air frying requires less oil than deep frying, you still need to use some oil to prevent the food from sticking and to enhance the flavor and texture. You can either spray the food with oil or brush it lightly with oil. You can also use oil-based marinades or dressings for extra flavor. Avoid using too much oil, as this can cause smoking and dripping.
Choose the right foods. Not all foods are suitable for air frying. Some foods that work well in an air fryer are meat, poultry, seafood, vegetables, fruits, and breaded or battered foods. Some foods that do not work well in an air fryer are cheese, eggs, rice, pasta, and wet batters. You can also experiment with different foods and see how they turn out in an air fryer.
Clean the air fryer regularly. To maintain the performance and hygiene of your air fryer, you need to clean it after every use. You can wipe the exterior of the air fryer with a damp cloth and wash the basket and the tray with hot water and soap. You can also use a soft brush or a sponge to remove any food residue or grease. Make sure to dry the parts thoroughly before reassembling them.
Air Fryer Comparison Recommendations
If you are looking for an air fryer to buy, you might be overwhelmed by the many options available on the market. To help you narrow down your choices, we have selected three of the best air fryers that you can consider, based on their features, performance, and customer reviews. Here are our recommendations:
Air Fryer Recipes to Try
Now that you know how to use an air fryer and what to look for when buying one, you might be wondering what to cook with it. To give you some inspiration, we have compiled some of the best air fryer recipes that you can try, featuring some of the images and links you provided. These recipes are easy, delicious, and healthy, and they will show you the versatility and creativity of air frying. Here are some of the recipes to try:
Air Fryer Potato Cubes (Cubed Potatoes)
If you love potatoes, you will love these air fryer potato cubes. They are crispy on the outside, fluffy on the inside, and seasoned with garlic, rosemary, and parmesan cheese. They make a perfect side dish for any meal, or a snack on their own. You can find the full recipe and instructions here
Air Fryer Pears
Did you know that you can make a delicious dessert with just two ingredients in your air fryer? These air fryer pears are soft, juicy, and caramelized, and they are topped with a dollop of whipped cream and a sprinkle of cinnamon. They are a simple and elegant way to end a meal, or a treat for yourself. You can find the full recipe and instructions here: here
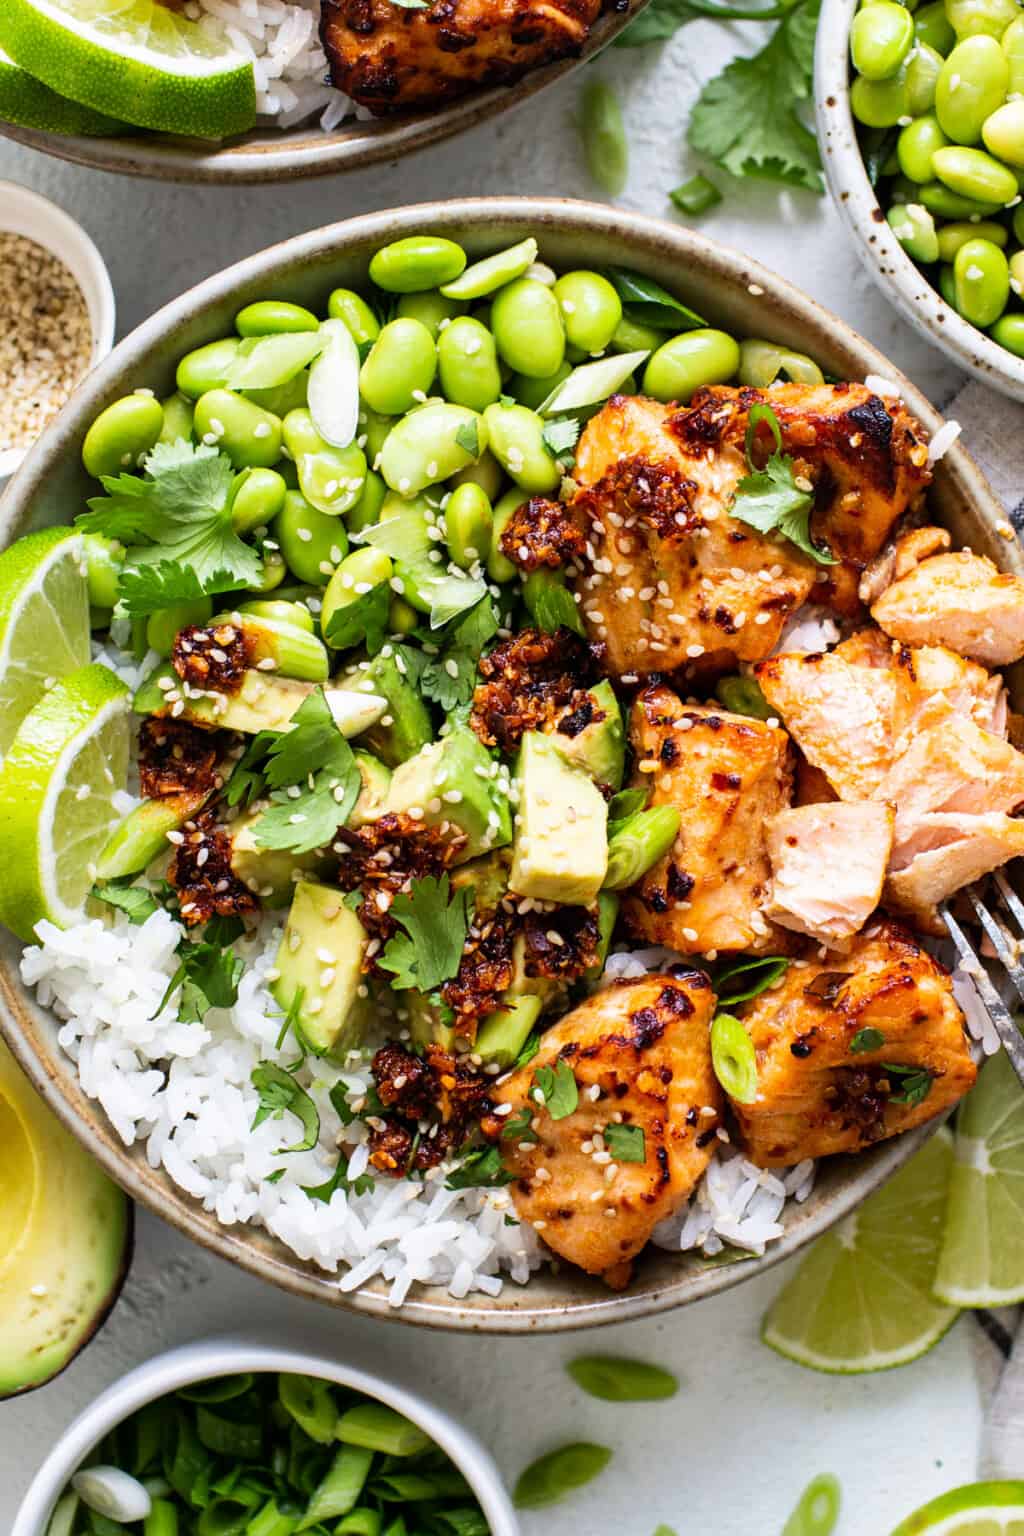
Honey Chili Crunch Air Fryer Salmon Bites
For a protein-packed and flavorful dish, you can try these honey chili crunch air fryer salmon bites. They are tender and flaky salmon pieces coated with a sweet and spicy sauce, and topped with crunchy sesame seeds and green onions. They are perfect for a quick and easy lunch or dinner, or as an appetizer for a party. You can find the full recipe and instructions here
Air Fryer Pork Chops Bone In
If you want to make juicy and tender pork chops in your air fryer, you can follow this recipe for air fryer pork chops bone in. They are seasoned with garlic, onion, paprika, and thyme, and cooked to perfection in the air fryer. They are a great main course for any occasion, and they pair well with salads, potatoes, or rice. You can find the full recipe and instructions here: here
Conclusion
Air frying is a fun and easy way to make delicious and healthy food in your kitchen. You can use an air fryer to make a variety of dishes, from appetizers to desserts, with little or no oil. You can also choose from different models and features of air fryers, depending on your needs and preferences. We hope that this guide has given you some useful information and tips on how to use an air fryer, as well as some recipes to try. Happy air frying!
This post may contain affiliate links, which means I will earn a small commission if you purchase through my links at no extra cost to you.
From the classic banana bread recipe to creative twists like the Peanut Butter Cup Banana Bread, this post offers a variety of recipes to suit all tastes and dietary preferences. Whether you’re a baking rookie or a seasoned chef, you’ll find a recipe that’s perfect for you. So why wait? Dive in and discover your new favorite banana bread recipe today!
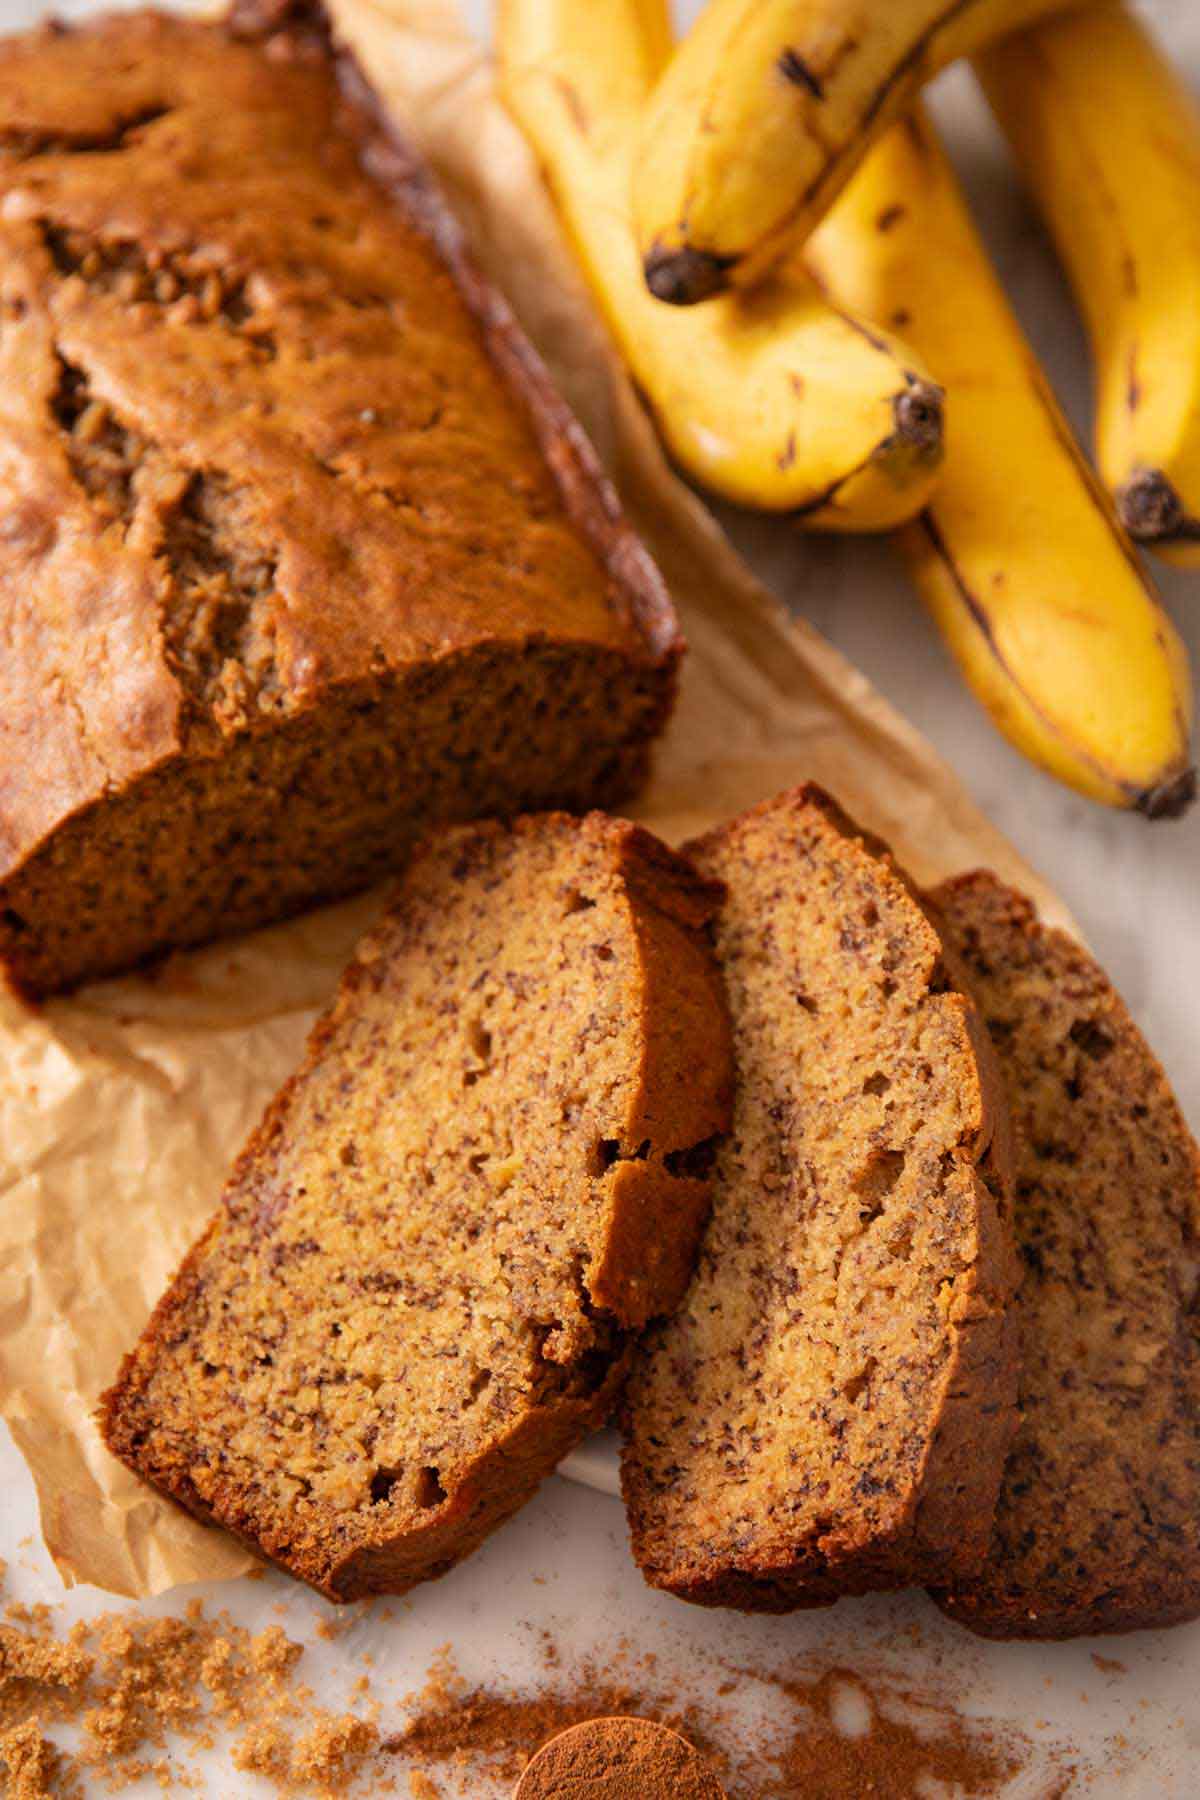
Banana Bread Recipe is a delightful recipe that uses ripe bananas to create a moist and flavorful bread with a hint of cinnamon. It’s an easy-to-follow recipe that’s perfect for using up those overripe bananas on your kitchen counter.
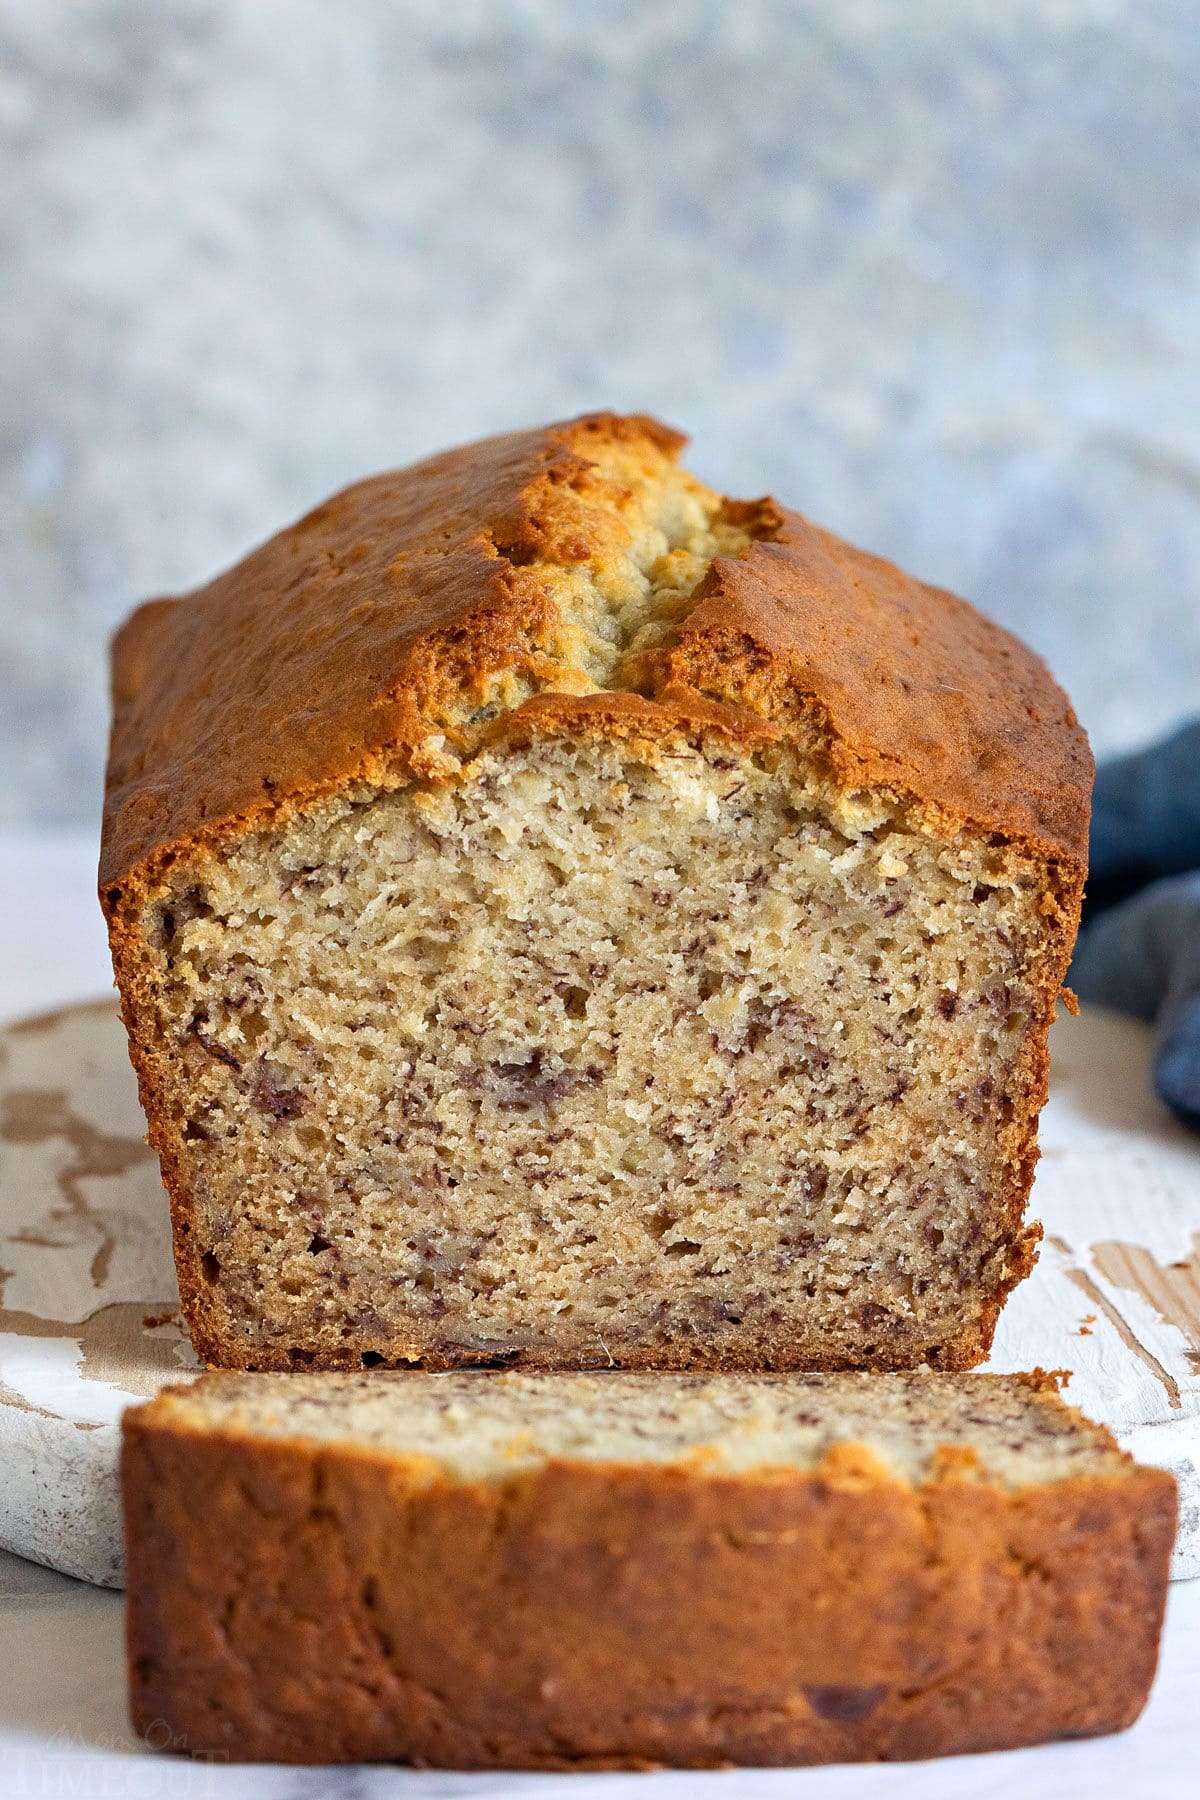
Best Chocolate Chip Banana Bread Recipe is a delicious upgrade to the classic banana bread, featuring melty chocolate chips nestled within banana-infused goodness. The recipe is simple and suitable for both baking rookies and seasoned chefs.
Gluten Free Banana Bread is a simple and delicious one-bowl recipe packed with nourishing ingredients and sweetened only with bananas. It’s gluten-free, grain-free, dairy-free, and paleo-friendly, making it suitable for a wide range of dietary preferences.
Classic Peruvian Banana Bread: Easy Queque De Platano Recipe is a classic Peruvian banana bread made with very ripe bananas or plantains, eggs, butter, flour, and some sugar for extra sweetness. The recipe also suggests adding cinnamon for a sweet-spicy kick and other optional ingredients like pecans, walnuts, raisins, cranberries, apricots, and chocolate.
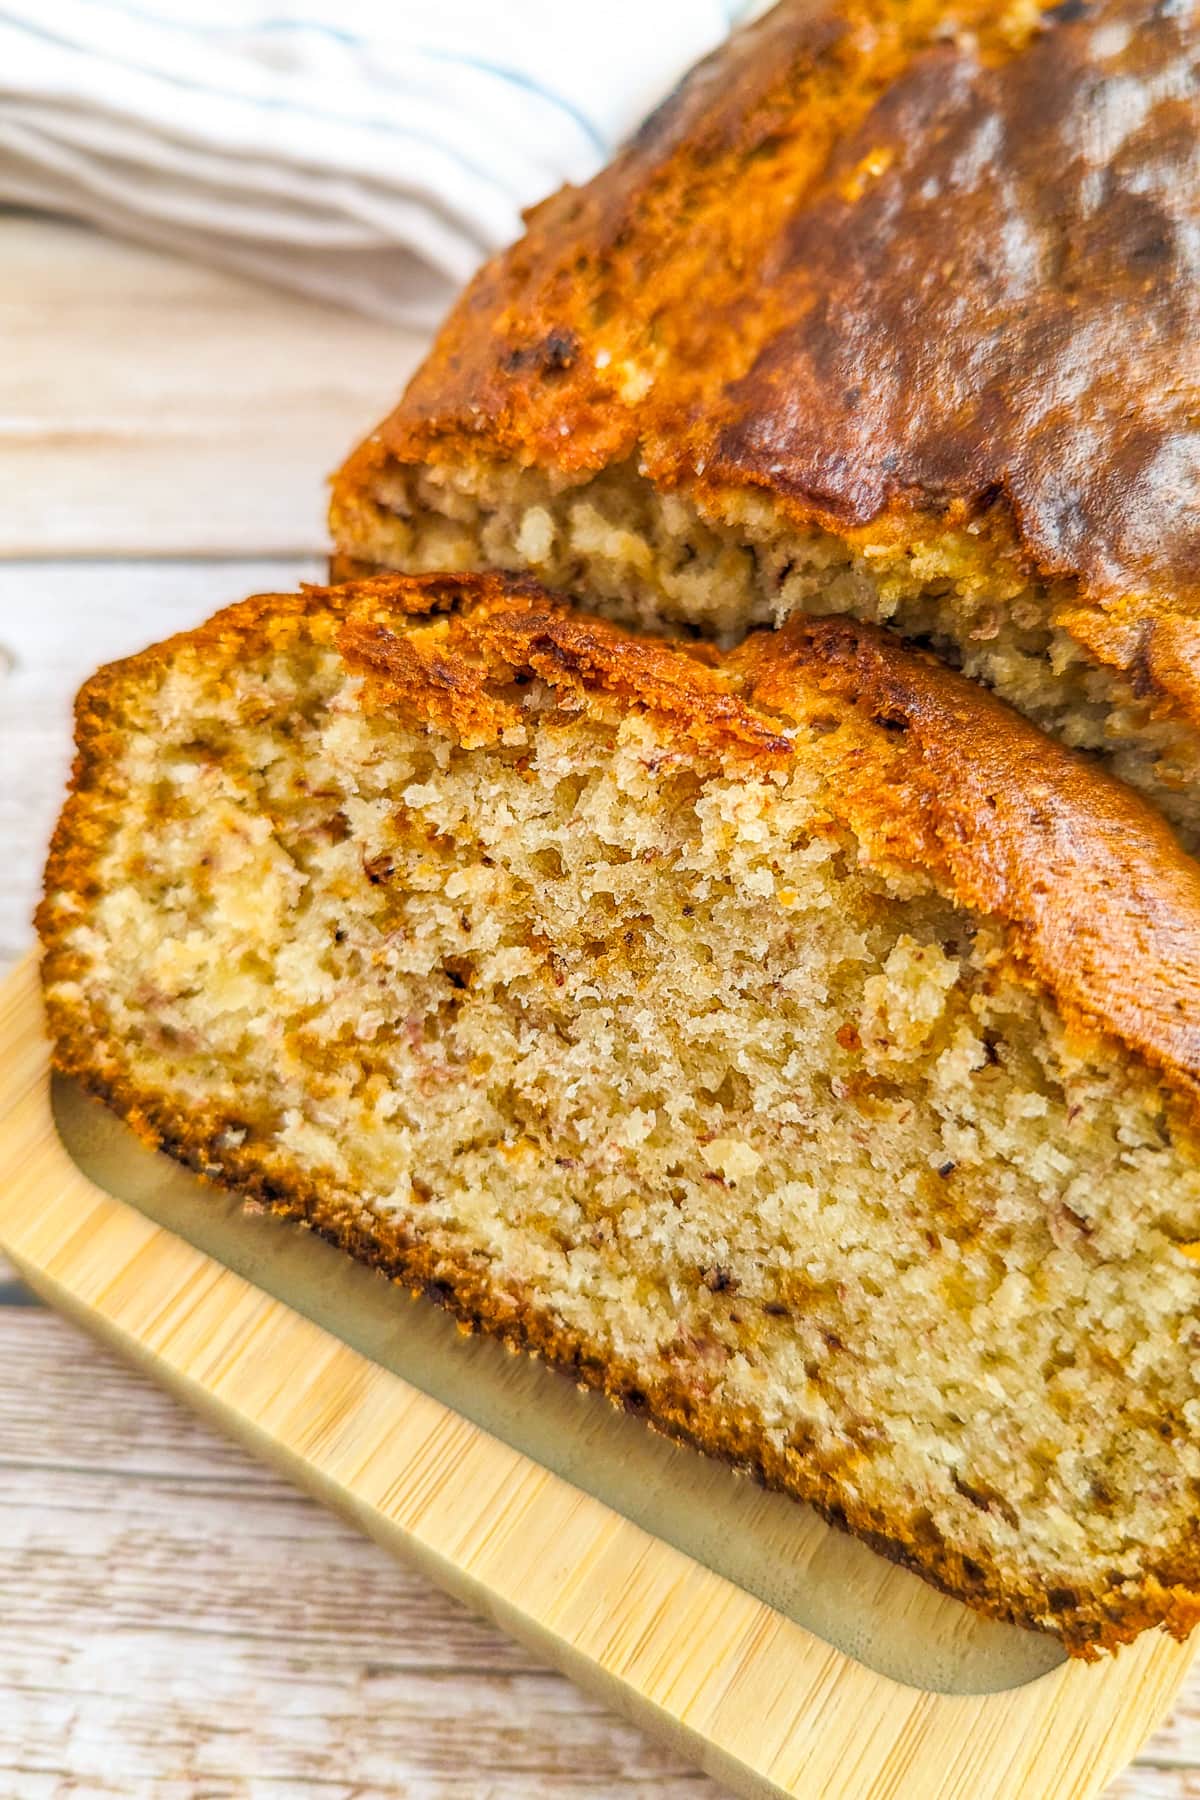
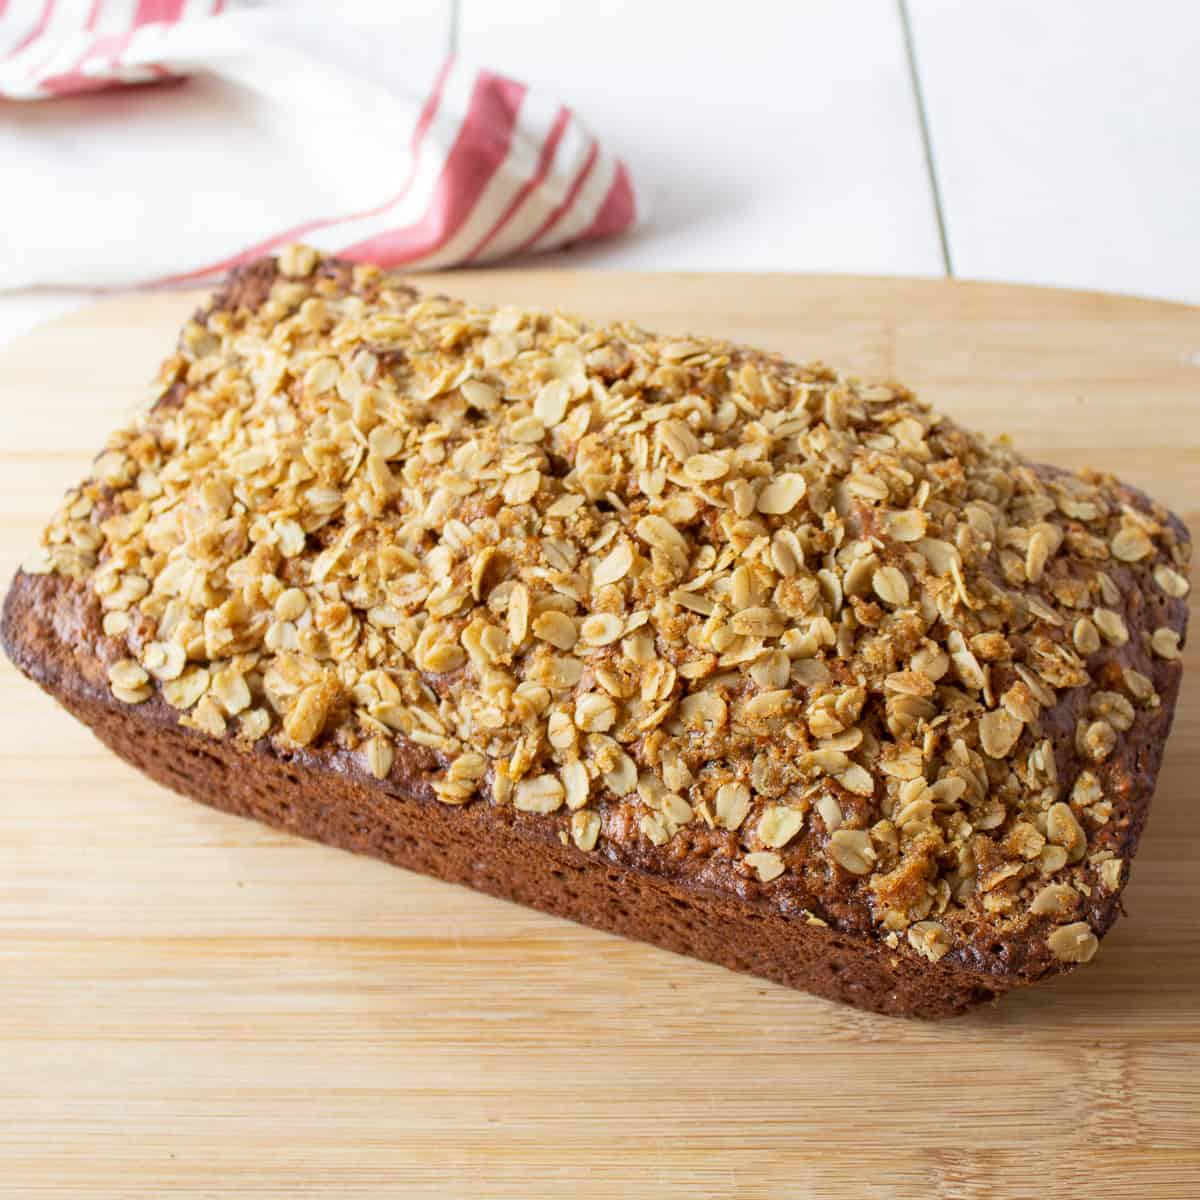
SIMPLY PERFECT BANANA BREAD RECIPE is a moist and hearty loaf of bread with a delicious oatmeal topping. It’s a customizable recipe that uses kitchen staples and ripe bananas.
Nourishing Almond Flour Banana Bread is a simple, one-bowl recipe that’s naturally sweetened with bananas and optionally, chocolate chips. It’s gluten-free, grain-free, dairy-free, and paleo-friendly, making it a great choice for those with specific dietary needs.
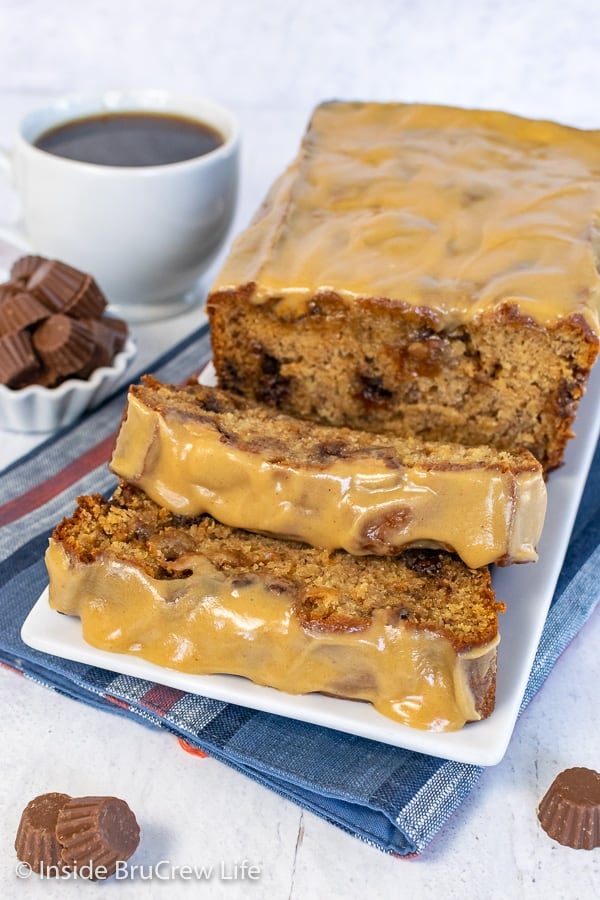
PEANUT BUTTER CUP BANANA BREAD is a unique twist on the classic banana bread, featuring mini peanut butter cups and a peanut butter glaze. It’s a delicious choice for breakfast or a snack and is sure to be a hit with peanut butter lovers.
Oatmeal Banana Bread is a hearty banana bread recipe that incorporates oatmeal in the bread and a tasty oatmeal topping. It’s a quick and easy recipe that’s perfect for using up overripe bananas.
EASY CRANBERRY BANANA NUT BREAD (HOLIDAY RECIPE) is a festive favorite that combines tart cranberries and sweet bananas to create a delicious bread perfect for the holiday season. The recipe is easy to follow and makes a great breakfast or afternoon snack.