Mac and cheese is one of the most popular comfort foods in the world. It’s creamy, cheesy, and satisfying. But did you know that there are many ways to make mac and cheese even better? In this blog post, I will show you four amazing recipes for mac and cheese that will take your dish to the next level. Whether you want to make it in a cast iron skillet, bake it in the oven, smoke it with bacon, or whip it up in a flash, I have the perfect recipe for you.
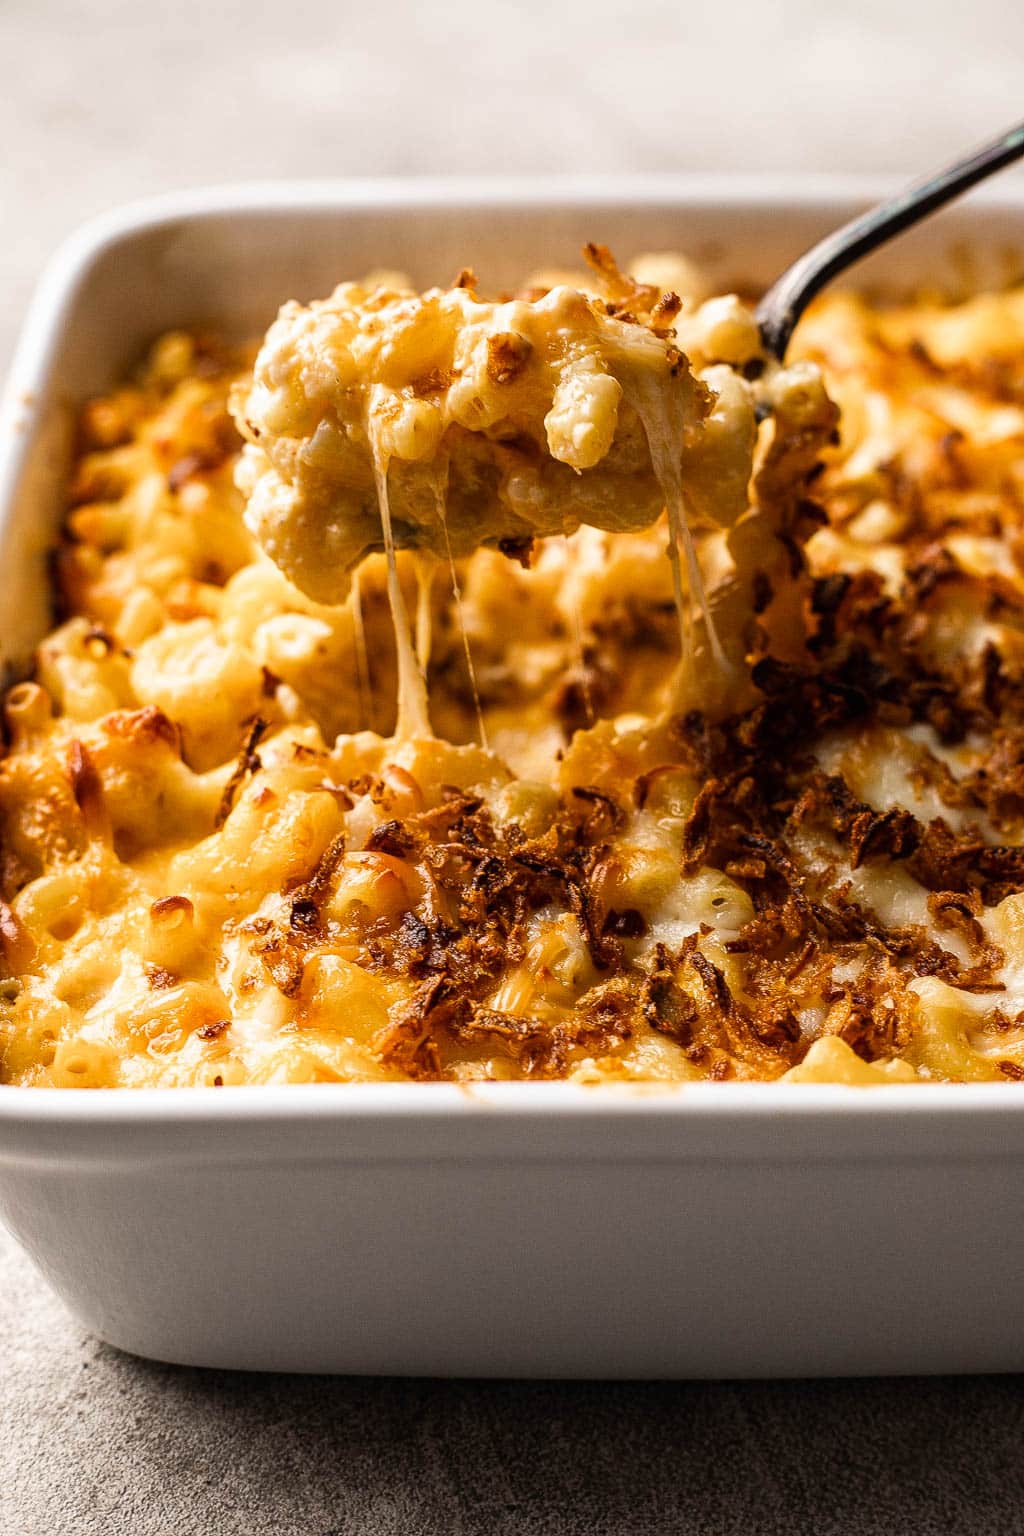
This recipe from The Rooted Farmhouse is a great way to make mac and cheese in one pan. You don’t need to boil the pasta separately, just cook it in the same skillet with milk, butter, and cheese. The result is a rich and creamy mac and cheese with a crispy crust. You can also add some extra ingredients like ham, broccoli, or bacon to make it more hearty.
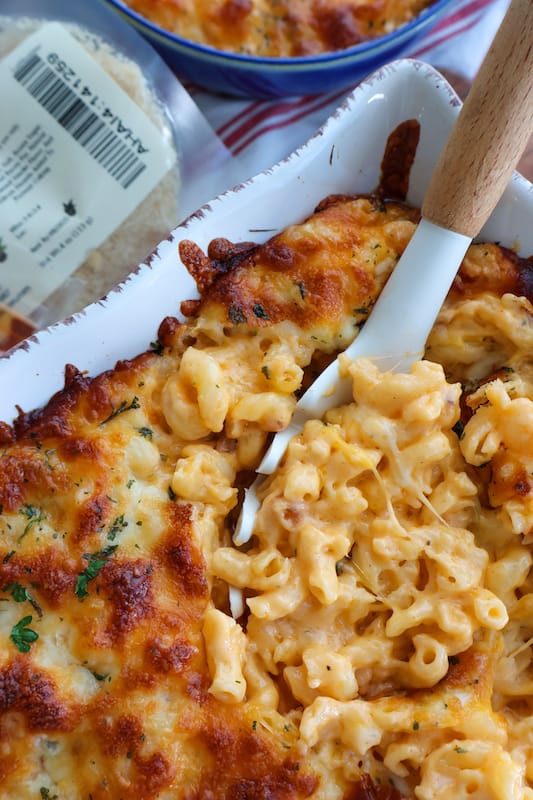
This recipe from So Much Food is a classic southern dish that is sure to please everyone. It’s made with a creamy cheese sauce, eggs, evaporated milk, and lots of cheese. It’s baked in the oven until it’s gooey and golden. You can also add some spices like paprika, cayenne, or nutmeg to give it some extra flavor.
This recipe from Golden Grace Kitchen is a delicious way to make mac and cheese on the grill. You don’t need to pre-cook the pasta, just mix it with cheese, milk, cream, and bacon, and smoke it in a foil pan. The result is a smoky and cheesy mac and cheese with crispy bacon bits. You can also add some barbecue sauce, green onions, or jalapeños to make it more flavorful.
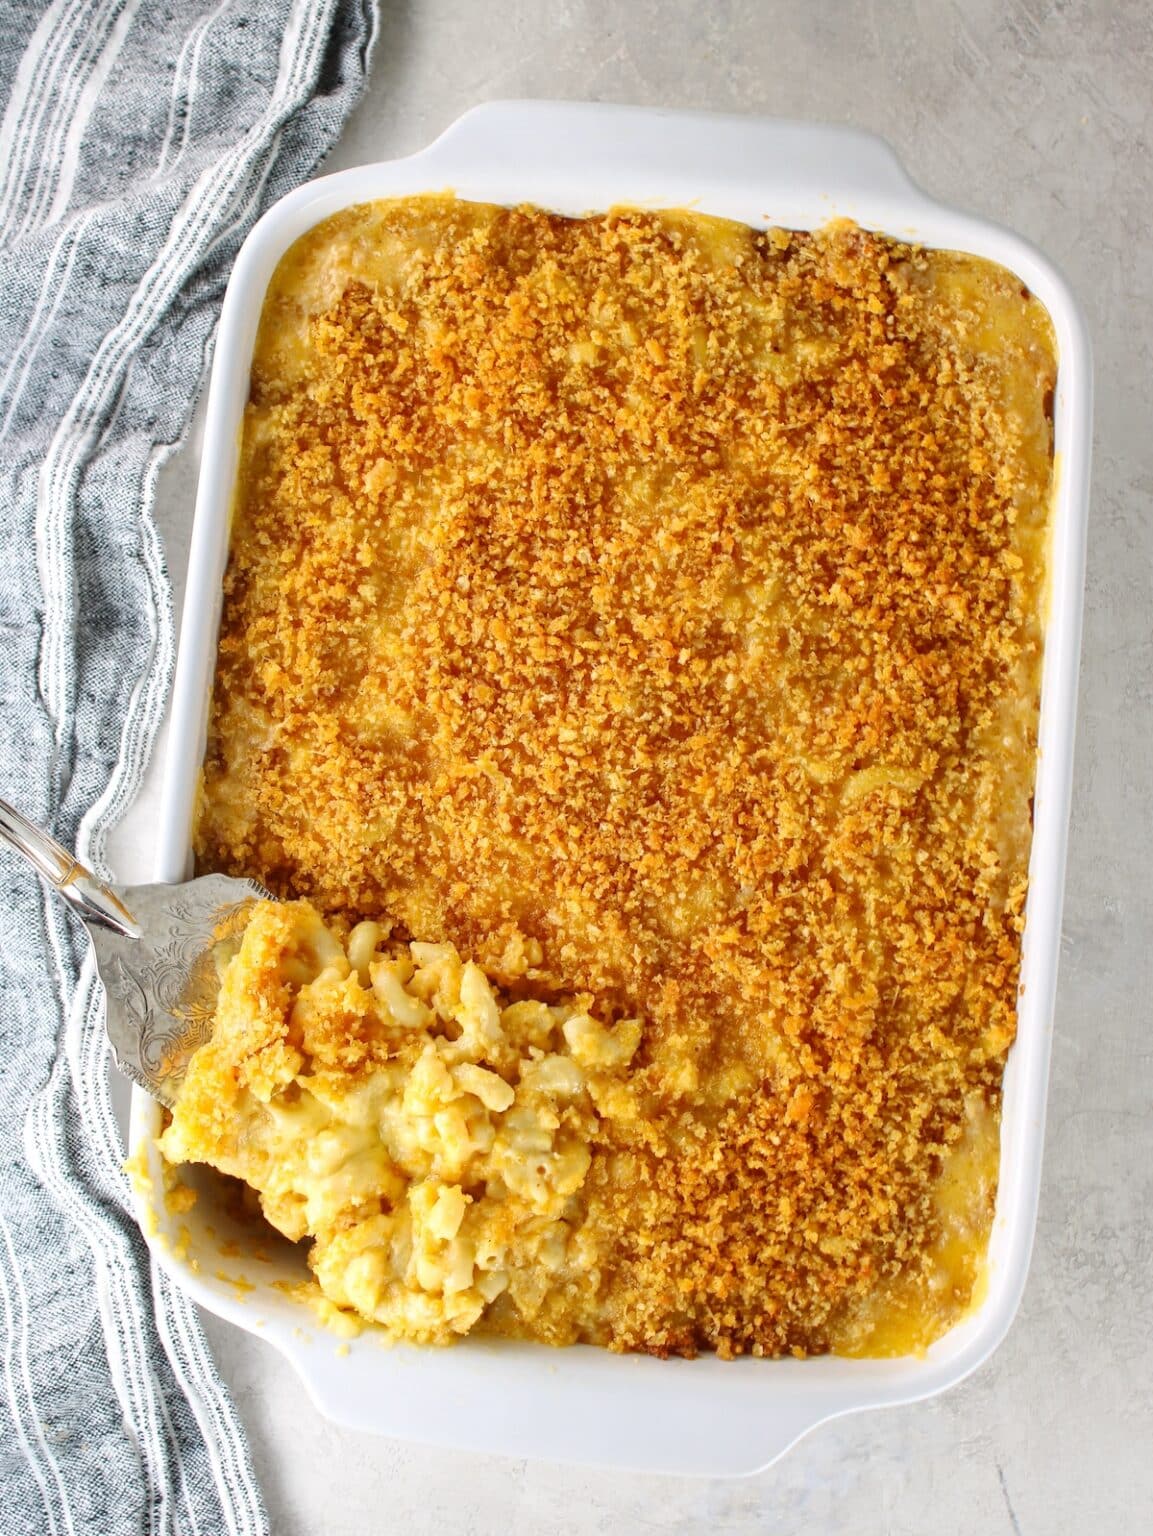
This recipe from Taste and See is a quick and easy way to make mac and cheese in a pot. You don’t need to make a roux or a cheese sauce, just cook the pasta in chicken broth and milk, and stir in the cheese. The result is a creamy and cheesy mac and cheese that is ready in 20 minutes. You can also add some chicken, broccoli, or mushrooms to make it more filling.
I hope you enjoyed these four amazing recipes for mac and cheese. If you want to enjoy a warm and delicious meal at work or school, you need to read this guide on how to choose the best electric lunch box for your needs. Click here to find out more! 👇 Thank you for reading! 😊
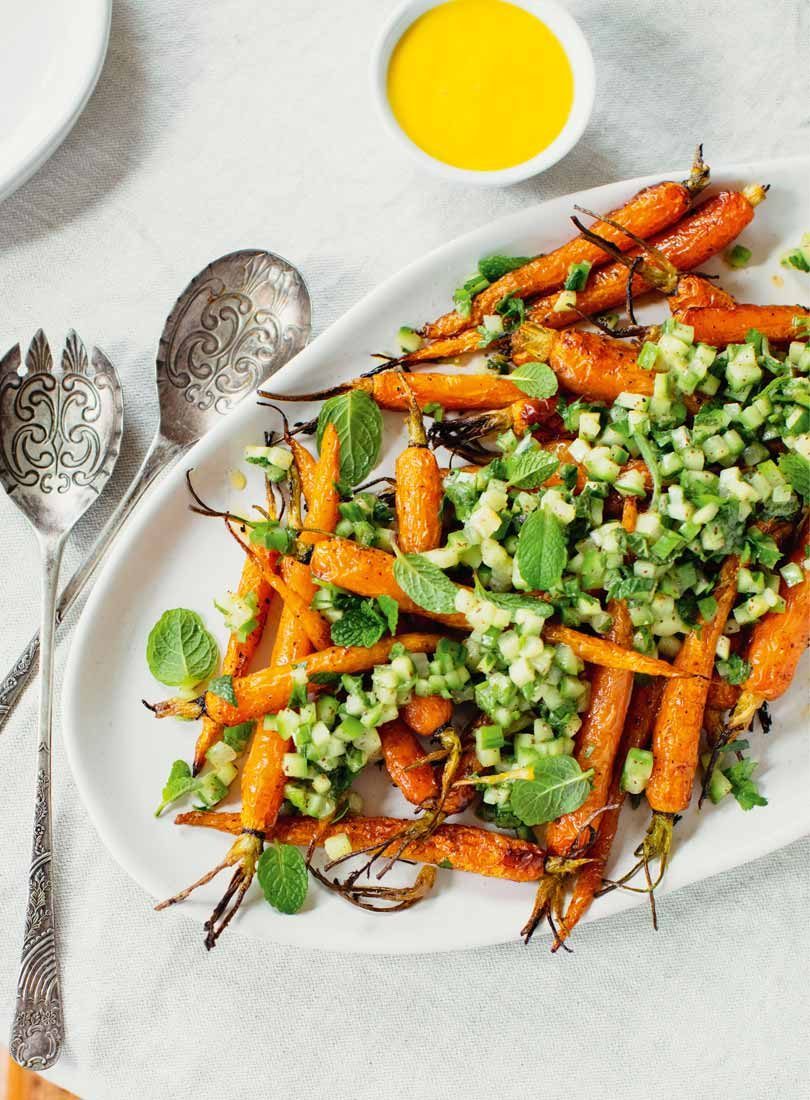
Explore a world of flavors with our dinner ideas featuring roasted carrots. From the hearty and satisfying Roasted Carrots with Farro, Chickpeas & Herbed Crème Fraîche, to the exotic Roasted Carrots with Dukkah Brittle, and the zesty Roasted Carrots with Sumac Cucumber & Preserved Lemon Dressing, there’s a dish for every palate. Whether you’re looking for a vegan, gluten-free, dairy-free, or low-carb option, these recipes offer a variety of nutritious and delicious choices for your next meal.
This is a hearty and satisfying vegetarian dish that features roasted carrots, cooked farro, chickpeas, and a tangy herbed crème fraîche sauce. The recipe also includes instructions for making your own crème fraîche at home. The dish is colorful, flavorful, and nutritious, perfect for a cozy fall or winter meal.
This is a simple and elegant side dish that pairs roasted carrots with a creamy and spicy avocado puree. The puree is made with ripe avocado, fresh cilantro, lime juice, garlic, and ground coriander. The dish is vegan, gluten-free, and dairy-free, and can be served hot or cold.
This is a festive and delicious side dish that showcases the natural sweetness and beauty of rainbow carrots. The carrots are roasted until tender and caramelized, then drizzled with a maple dijon sauce that adds a touch of tanginess and spice. The dish is vegan, gluten-free, and easy to make, ideal for a holiday or special occasion.
This is a creative and exotic side dish that combines roasted carrots with a crunchy and nutty dukkah brittle. Dukkah is an Egyptian spice blend that typically contains sesame seeds, nuts, and spices. The brittle is made with sugar, water, and dukkah, and can be broken into pieces and sprinkled over the carrots. The dish is vegan, gluten-free, and full of flavor and texture.
This is a refreshing and zesty side dish that features roasted carrots, sliced cucumber, and a dressing made with sumac, preserved lemon, garlic, and olive oil. Sumac is a Middle Eastern spice that has a sour and lemony flavor, while preserved lemon is a Moroccan ingredient that adds a salty and citrusy punch. The dish is vegan, gluten-free, and low-carb, and can be enjoyed as a salad or a dip.
This is a vibrant and flavorful side dish that pairs roasted carrots with a green herb chutney. The chutney is made with fresh mint, cilantro, green chilies, ginger, garlic, lemon juice, and salt, and can be blended to a smooth or chunky consistency. The dish is vegan, gluten-free, and dairy-free, and can be served hot or cold.
This is a classic and comforting side dish that roasts carrots and parsnips with honey, olive oil, salt, pepper, and fresh thyme. The honey adds a touch of sweetness and caramelization, while the thyme adds a hint of herbaceousness. The dish is vegetarian, gluten-free, and dairy-free, and can be enjoyed with any main course.
Do you want to save time, money, and stress while feeding your family nutritious and tasty food? If so, you might be interested in meal planning, a simple and effective way to organize your meals ahead of time. In this guide, I will show you how to plan a month of healthy and delicious meals for your family in just one hour. You will learn how to:
Choose a meal planning method that suits your lifestyle and preferences
Create a monthly menu based on your family’s needs and preferences
Make a shopping list and stock up on pantry staples
Prep and cook your meals in batches and store them safely
Enjoy your meals throughout the month with minimal hassle
By following these steps, you will be able to save time, money, and stress while feeding your family nutritious and tasty food. Ready to get started? Let’s dive in!
Choose a Meal Planning Method
The first step to plan a month of healthy and delicious meals for your family is to choose a meal planning method that suits your lifestyle and preferences. There are different ways to plan your meals, such as:
Theme nights: You assign a theme to each night of the week, such as Meatless Monday, Taco Tuesday, Pasta Wednesday, etc. This way, you have a general idea of what to cook each night, and you can vary the ingredients and recipes within each theme.
Weekly rotation: You create a weekly menu that includes breakfast, lunch, dinner, and snacks, and you repeat it every week for a month. This way, you only have to plan once, and you can make minor adjustments as needed.
Monthly calendar: You create a monthly menu that includes breakfast, lunch, dinner, and snacks, and you follow it for the whole month. This way, you have a clear overview of what to cook each day, and you can plan ahead for special occasions and events.
There is no right or wrong way to plan your meals, as long as it works for you and your family. You can also mix and match different methods, or try different ones until you find your favorite. The key is to find a method that makes meal planning easy and fun for you.
Create a Monthly Menu
The next step to plan a month of healthy and delicious meals for your family is to create a monthly menu based on your family’s needs and preferences. To do this, you will need to:
Consider your family’s dietary requirements, allergies, intolerances, likes, and dislikes. You want to make sure that your menu includes meals that everyone can enjoy and that meet their nutritional needs.
Consider your budget and availability of ingredients. You want to make sure that your menu is affordable and realistic, and that you can easily find the ingredients you need at your local grocery store or online.
Consider the season and weather. You want to make sure that your menu is appropriate for the time of the year, and that it includes seasonal and fresh produce, as well as warm or cold dishes depending on the temperature.
Consider the variety and balance. You want to make sure that your menu is diverse and interesting, and that it includes a variety of colors, textures, flavors, and cuisines. You also want to make sure that your menu is balanced, and that it includes a combination of protein, carbohydrates, fats, fiber, vitamins, and minerals.
Once you have considered these factors, you can start creating your monthly menu. You can use a spreadsheet, a calendar, a planner, or an app to write down your meals for each day of the month. You can also use online tools, such as Eat This Much, Mealime, or Plan to Eat to generate meal plans based on your preferences and budget.
As you create your monthly menu, remember to be flexible and adaptable. You don’t have to follow your menu strictly, and you can always swap, skip, or add meals as you go. The goal is to have a general plan that helps you stay organized and motivated, not a rigid schedule that stresses you out.
Make a Shopping List and Stock Up on Pantry Staples
The third step to plan a month of healthy and delicious meals for your family is to make a shopping list and stock up on pantry staples. To do this, you will need to:
Review your monthly menu and write down the ingredients you need for each meal. You can group them by category, such as produce, dairy, meat, grains, etc., or by store section, such as bakery, deli, frozen, etc. You can also use online tools, such as AnyList, Out of Milk to create and manage your shopping list.
Check your pantry, fridge, and freezer and cross off the items you already have. You can also use online tools, such as SuperCook, MyFridgeFood to find recipes based on the ingredients you have on hand.
Stock up on pantry staples that have a long shelf life and that you can use for multiple meals, such as rice, pasta, beans, lentils, canned tomatoes, canned tuna, nuts, seeds, dried fruits, spices, herbs, oils, vinegars, sauces, etc. These items will help you create quick and easy meals when you are short on time or ingredients.
Once you have your shopping list and your pantry staples, you can go grocery shopping. You can choose to shop once a month, once a week, or as often as you need, depending on your preferences and availability. You can also choose to shop online or in person, depending on your convenience and comfort. You can also use online tools, such as Instacart, Amazon Fresh, or Walmart Grocery, to order your groceries online and have them delivered to your door.
Prep and Cook Your Meals in Batches and Store Them Safely
The fourth step to plan a month of healthy and delicious meals for your family is to prep and cook your meals in batches and store them safely. To do this, you will need to:
Choose a day and time to prep and cook your meals for the week or the month. You can choose a weekend, a weekday, or any day that works for you and your schedule. You can also choose to prep and cook all your meals at once, or split them into smaller sessions throughout the week or the month.
Gather your ingredients, equipment, and containers. You will need use such as to measure, store, and organize your food.
Follow your recipes and instructions to prep and cook your meals. You can use online tools, such as Allrecipes, Food Network, or BBC Good Food, to find and follow recipes for your meals. You can also use online tools, such as Paprika, BigOven, or Copy Me That, to save, organize, and access your recipes on your devices.
Store your meals safely in your containers and label them with the name, date, and reheating instructions. You can use online tools, such as Evernote, Google Keep, or Notion, to create and manage your labels. You can also use online tools, such as FoodKeeper, StillTasty to check the shelf life and safety of your food.
Once you have prepped and cooked your meals and stored them safely, you can enjoy your meals throughout the month with minimal hassle. You can reheat your meals in the microwave, oven, stove, or air fryer, depending on the type of food and container. You can also add some fresh ingredients, such as salad, fruit, yogurt, cheese, or bread, to complement your meals and add some variety.
Enjoy Your Meals Throughout the Month
The final step to plan a month of healthy and delicious meals for your family is to enjoy your meals throughout the month. To do this, you will need to:
Follow your monthly menu and choose the meals you want to eat each day. You can also be flexible and swap, skip, or add meals as you go, depending on your mood, appetite, and availability.
Reheat your meals and serve them with some fresh ingredients, if desired. You can also garnish your meals with some herbs, spices, sauces, or cheese, to enhance the flavor and appearance.
Eat your meals with your family and enjoy the quality time and conversation. You can also use online tools, such as Conversation Starters to spark some fun and interesting discussions with your family.
By following these steps, you will be able to enjoy a month of healthy and delicious meals with your family, without spending too much time, money, or stress. You will also be able to improve your health, happiness, and well-being, as well as your family’s. Meal planning is a simple and effective way to organize your meals ahead of time, and it can make a huge difference in your life. I hope you found this guide helpful and informative, and I hope you give meal planning a try. Bon appétit!
This post may contain affiliate links, which means I will earn a small commission if you purchase through my links at no extra cost to you.
If you love chicken, but want to avoid the hassle and mess of deep frying, then you need to try these amazing air fryer chicken recipes. Air frying is a fast and easy way to cook chicken that results in crispy, juicy, and tender meat. You can make a variety of dishes with air fryer chicken, from kabobs to meatballs, and enjoy them with your favorite sauces and sides. In this blog post, I will share with you five of the best air fryer chicken recipes that you can make in minutes. These recipes are simple, flavorful, and perfect for any occasion. Let’s get started!
EASY AIR FRYER CHICKEN KABOBS
These air fryer chicken kabobs are a great appetizer or main course that you can customize with your favorite vegetables and seasonings. They are easy to make, and you only need a few ingredients. You can serve them with rice, salad, or pita bread. Here is how to make them:
Cut 1 pound of boneless, skinless chicken breasts into 1-inch pieces and season with salt, pepper, garlic powder, and paprika.
Cut 1 red onion, 1 green bell pepper, and 8 ounces of mushrooms into similar-sized pieces.
Thread the chicken and vegetables onto 8 metal or wooden skewers. If using wooden skewers, soak them in water for 30 minutes before using.
Preheat your air fryer to 400°F and spray the basket with cooking spray.
Place the kabobs in a single layer in the basket and cook for 15 minutes, turning halfway through, until the chicken is cooked through and the vegetables are tender.
Enjoy with your favorite sauce, such as barbecue, teriyaki, or tzatziki.
These air fryer crispy chicken thighs are a delicious and healthy alternative to fried chicken. They are crispy on the outside and juicy on the inside, and they only require four ingredients. You can season them with your favorite spices, such as cumin, curry, or cayenne. Here is how to make them:
Pat dry 4 bone-in, skin-on chicken thighs with paper towels and season with salt and pepper.
Preheat your air fryer to 375°F and spray the basket with cooking spray.
Place the chicken thighs skin-side down in the basket and cook for 20 minutes, flipping halfway through, until the skin is golden and crisp and the meat is cooked through.
Enjoy with your favorite side dish, such as mashed potatoes, roasted vegetables, or coleslaw.
These air fryer chicken meatballs are a great way to use ground chicken, and they are so easy to make. They are moist, tender, and flavorful, and they don’t require any eggs or breadcrumbs. You can make them with any herbs and spices you like, such as parsley, basil, or oregano. Here is how to make them:
In a large bowl, combine 1 pound of ground chicken, 1/4 cup of grated Parmesan cheese, 2 tablespoons of chopped fresh parsley, 2 teaspoons of minced garlic, 1 teaspoon of salt, and 1/2 teaspoon of black pepper.
Mix well and shape into 16 meatballs, about 1 1/2 inches each.
Preheat your air fryer to 375°F and spray the basket with cooking spray.
Place the meatballs in a single layer in the basket and cook for 12 minutes, turning halfway through, until golden and cooked through.
Enjoy with your favorite sauce, such as marinara, pesto, or alfredo.
These air fryer chicken thighs are a simple and tasty way to cook chicken without any oil or butter. They are seasoned with a homemade spice blend that gives them a nice flavor and color. You can adjust the spices to your liking, such as adding more or less salt, paprika, or garlic powder. Here is how to make them:
In a small bowl, whisk together 1 teaspoon of salt, 1/2 teaspoon of paprika, 1/4 teaspoon of garlic powder, 1/4 teaspoon of onion powder, 1/4 teaspoon of black pepper, and 1/4 teaspoon of dried thyme.
Pat dry 4 boneless, skinless chicken thighs with paper towels and rub the spice mixture all over them.
Preheat your air fryer to 400°F and spray the basket with cooking spray.
Place the chicken thighs in a single layer in the basket and cook for 18 minutes, flipping halfway through, until the chicken is cooked through and the juices run clear.
As you can see, air frying is a great way to make delicious and healthy chicken recipes in minutes. You can use your air fryer to make a variety of dishes, from kabobs to meatballs, and enjoy them with your favorite sauces and sides. Air frying is also a convenient and easy way to cook chicken, as it requires minimal preparation and cleanup. I hope you enjoyed this blog post and found some new air fryer chicken recipes to try. Thank you for reading!
Rice is one of the most versatile and satisfying grains you can cook with. It can be fluffy, creamy, crunchy, or sticky, depending on how you prepare it. It can also be paired with a variety of ingredients and flavors, from spicy kimchi to creamy cauliflower. In this post, I will share with you four delicious and easy rice recipes that you can make in less than 30 minutes. Whether you are looking for a vegan, keto, or gluten-free option, there is something for everyone in this list.
Do you want to enjoy hot and fresh meals anywhere you go? Learn how to choose and use an electric lunch box with this comprehensive guide. Click here to read more! 👉
Kimchi fried rice is a popular Korean dish that is spicy, tangy, and savory. It is a great way to use up leftover rice and kimchi, as well as any other vegetables or proteins you have on hand. This recipe from Live Eat Learn is super simple and quick, requiring only 15 minutes and a few ingredients. This kimchi fried rice is a perfect meal for busy weeknights, as it is filling, flavorful, and easy to customize. You can also make it vegan by omitting the egg and using vegan kimchi.
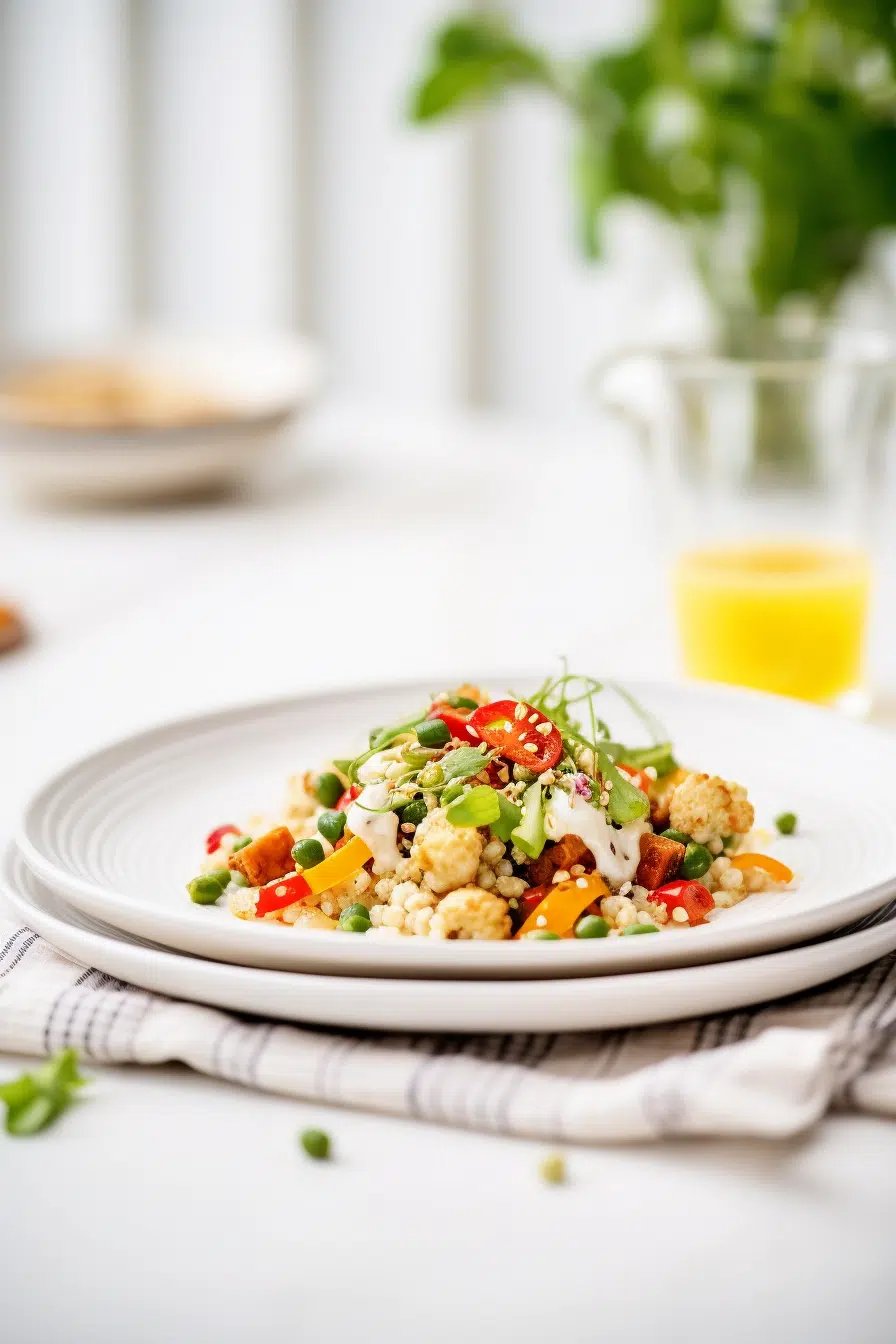
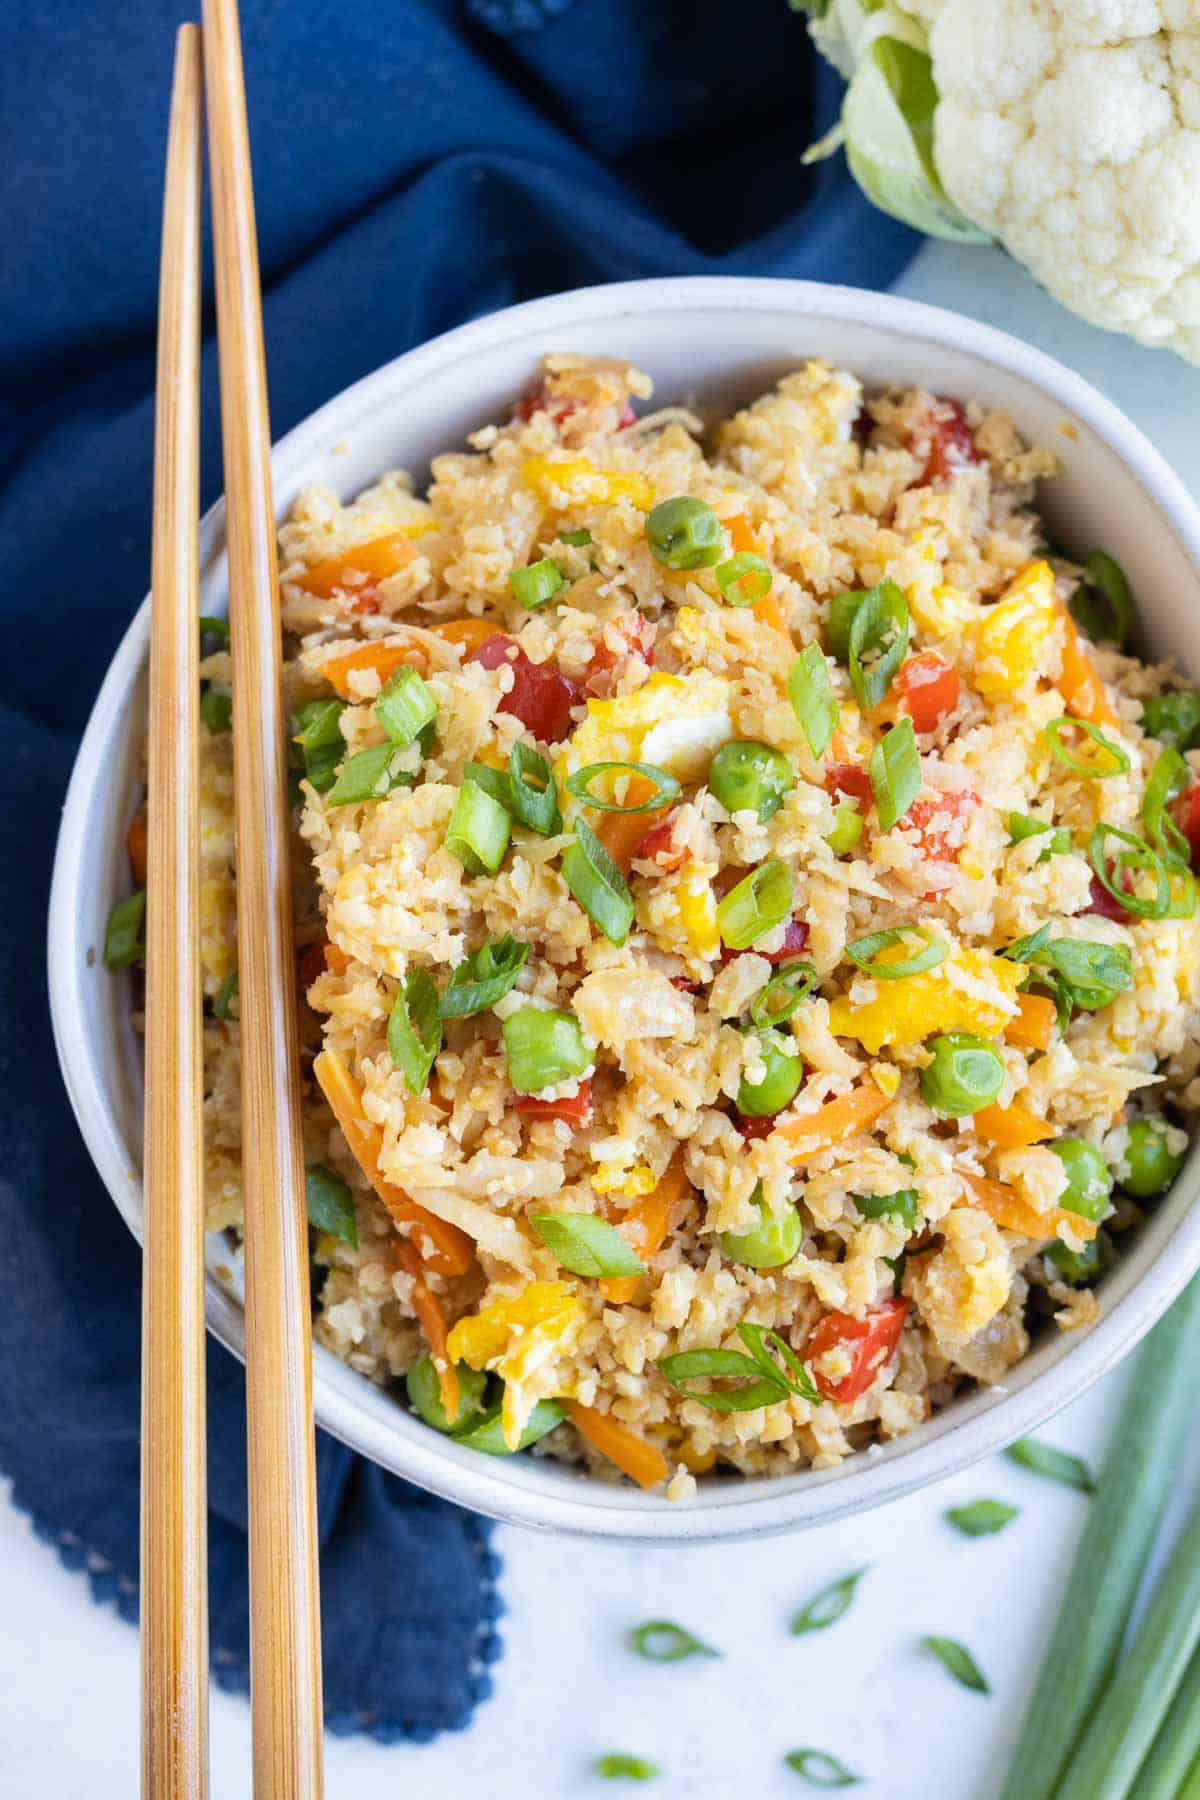
If you are following a vegan or keto diet, you might think that rice is off-limits. But don’t worry, you can still enjoy a delicious fried rice dish with cauliflower instead of rice. Cauliflower is a low-carb and high-fiber vegetable that can mimic the texture and taste of rice when grated or processed. This recipe from I Eat Keto shows you how to make a vegan keto cauliflower fried rice that is loaded with veggies and protein. This vegan keto cauliflower fried rice is a great way to get more vegetables and protein in your diet, as well as satisfy your cravings for rice. You can also swap the tofu for any other vegan protein of your choice, such as tempeh, seitan, or edamame.
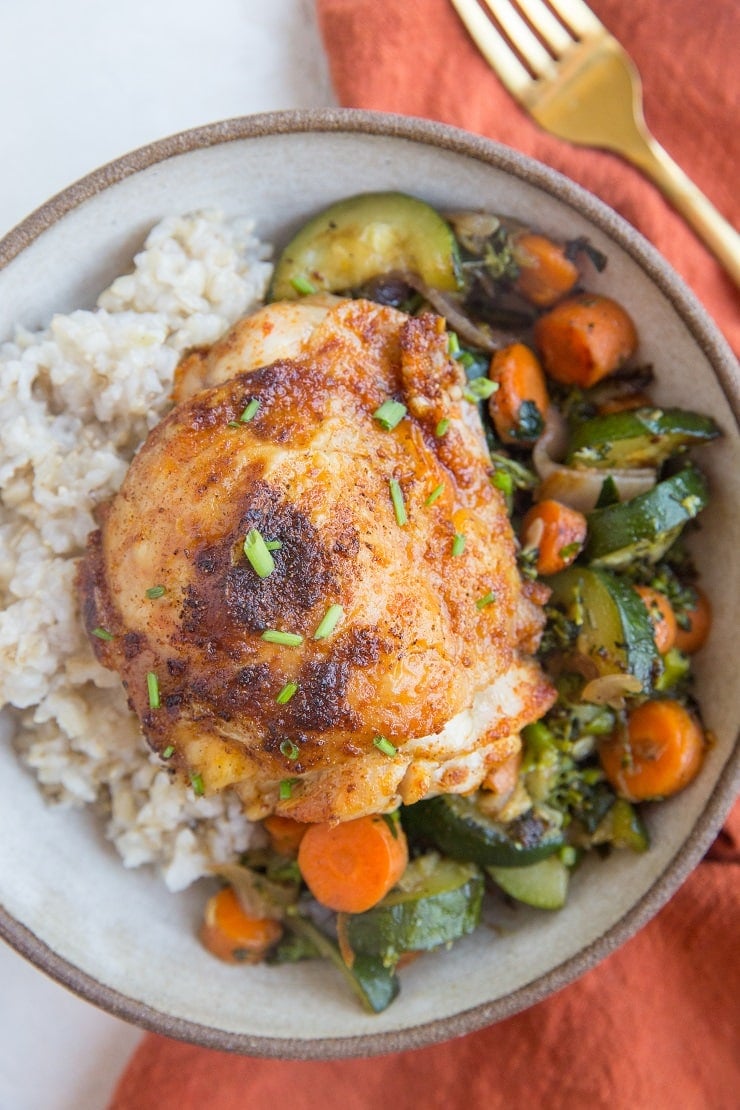
Did you know that you can make a complete meal in your rice cooker? Yes, you heard that right. You can cook rice and other ingredients at the same time, saving you time and dishes. This recipe from Life Currents shows you how to make a rice cooker meal with chicken, broccoli, and cheese. This rice cooker meal is a convenient and comforting dish that you can make with minimal effort and cleanup. You can also vary the ingredients according to your preferences, such as using different types of cheese, vegetables, or meat.
Another way to use cauliflower rice is to make a stir-fry with it. This recipe from Evolving Table is a healthy and delicious alternative to regular rice stir-fry, as it is low-carb, gluten-free, and dairy-free. It is also packed with vegetables and chicken, making it a balanced and satisfying meal. This cauliflower rice stir-fry is a light and tasty dish that you can make in less than 30 minutes. You can also make it vegan by replacing the chicken with tofu or mushrooms, and the honey with maple syrup or agave nectar.
I hope you enjoyed these four delicious and easy rice recipes. If you want to enjoy a warm and delicious meal at work or school, you need to read this guide on how to choose the best electric lunch box for your needs. Click here to find out more! 👇Thank you for reading, and happy cooking! 😊
Fried rice is one of the most popular and versatile dishes in the world. It is a great way to use up leftover rice and vegetables, and it can be customized to your taste and preference. Whether you like it spicy, savory, or sweet, there is a fried rice recipe for you.
In this blog post, I will share with you four easy and delicious fried rice recipes that you can make at home. These recipes are inspired by different cuisines and flavors, and they are all simple and quick to prepare. You will need a large skillet or wok, some cooked rice, eggs, oil, and some seasonings and sauces. You can also add any vegetables, meat, or seafood that you like.
Do you want to enjoy hot and fresh meals anywhere you go? Learn how to choose and use an electric lunch box with this comprehensive guide. Click here to read more! 👉
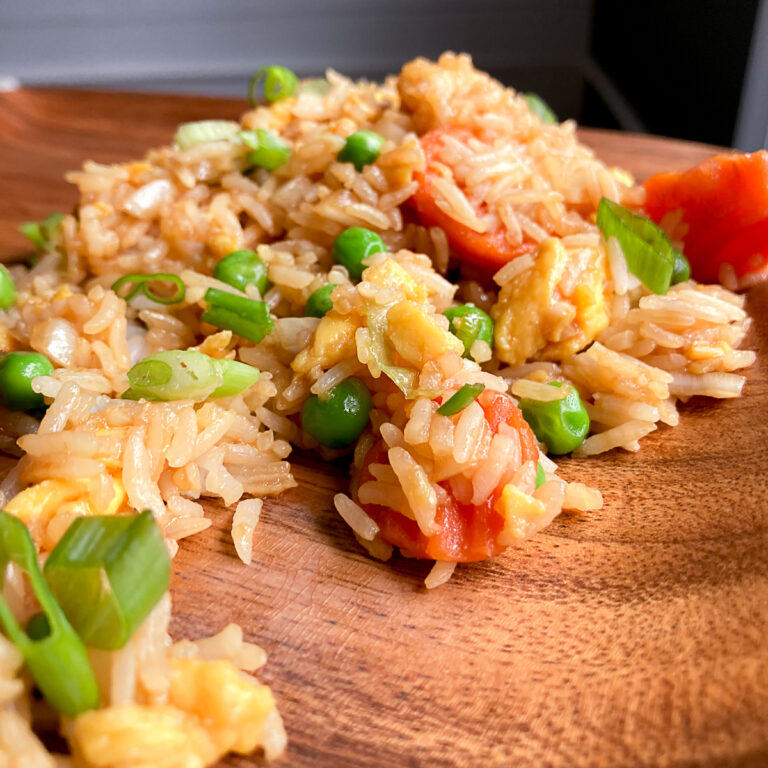
This recipe is from JoyFoodSunshine, and it is a classic vegetable fried rice that is loaded with flavor and nutrition. It is vegan, gluten-free, and dairy-free, and it can be easily adapted to your dietary needs. You can use brown rice, white rice, or even cauliflower rice for this recipe. You can also add any protein of your choice, such as chicken, beef, tofu, or shrimp.
The secret to making this fried rice is to use cold, cooked rice that has been refrigerated overnight. This will prevent the rice from sticking together and becoming mushy. You will also need some sesame oil, soy sauce, rice vinegar, garlic, ginger, green onions, carrots, peas, and corn. You will start by scrambling some eggs in a skillet, then setting them aside. Then, you will heat some oil and sauté the garlic, ginger, and green onions until fragrant. Next, you will add the rice and stir-fry it until it is hot and slightly crispy. Finally, you will add the soy sauce, rice vinegar, sesame oil, and the vegetables and eggs, and toss everything together until well combined.
This fried rice is so easy and delicious, you will never order takeout again!
This recipe is from SavorySweetSpoon, and it is a spicy and flavorful fried rice that is inspired by the Thai cuisine. It is made with jasmine rice, eggs, chicken, onion, garlic, Thai chili, fish sauce, oyster sauce, sugar, lime juice, and cilantro. You can also add any other vegetables that you like, such as bell peppers, carrots, or broccoli.
The key to making this fried rice is to use a high heat and a large skillet or wok, so that the rice can get crispy and charred. You will also need to cook the ingredients in batches, so that they don’t overcrowd the pan and steam instead of fry. You will start by heating some oil and frying the eggs until they are set, then breaking them into small pieces and setting them aside. Then, you will heat some more oil and cook the chicken until golden and cooked through, then setting it aside as well. Next, you will heat some more oil and sauté the onion, garlic, and chili until soft and aromatic. Then, you will add the rice and stir-fry it until it is hot and crispy. Finally, you will add the fish sauce, oyster sauce, sugar, lime juice, cilantro, and the chicken and eggs, and mix everything well.
This fried rice is spicy, tangy, and satisfying, and it goes well with some cucumber slices and lime wedges.
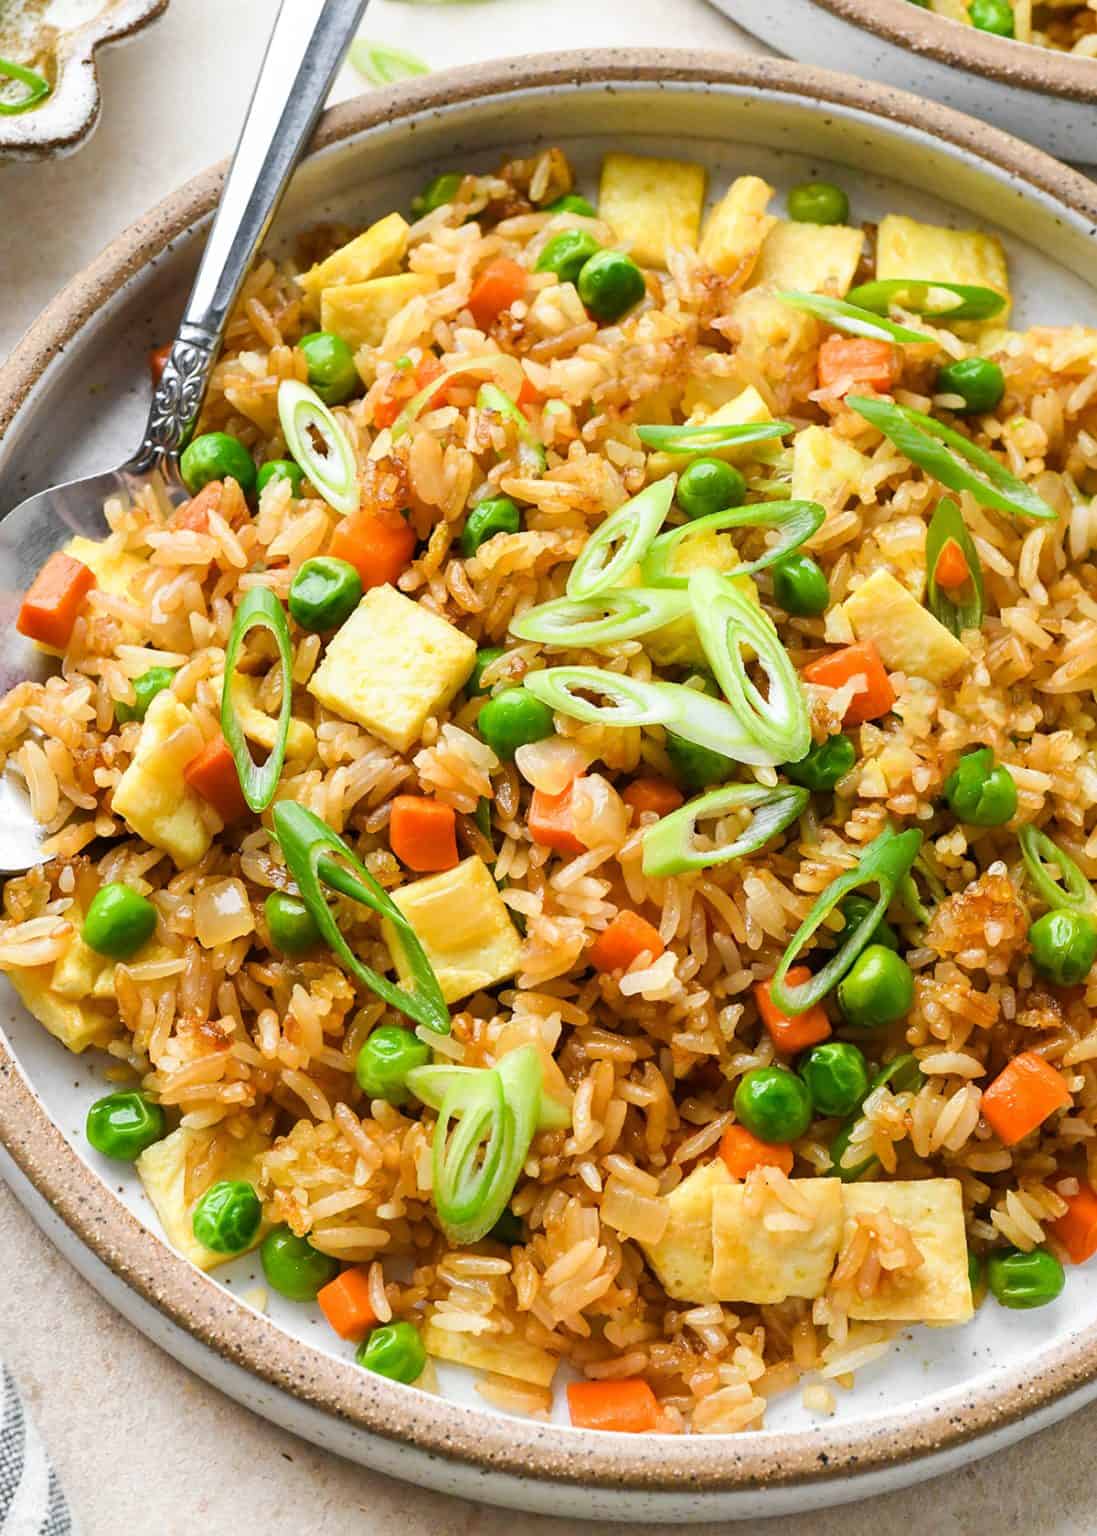
This recipe is from MyLifeAndKids, and it is a copycat of the famous Panda Express fried rice that is loved by many. It is made with long-grain white rice, eggs, green onions, peas, carrots, soy sauce, and sesame oil. It is simple, tasty, and kid-friendly, and it can be served as a side dish or a main course.
The trick to making this fried rice is to use a large skillet or wok that is very hot, so that the rice can get crispy and not soggy. You will also need to use cold, cooked rice that has been refrigerated overnight, so that it is dry and separated. You will start by heating some oil and scrambling some eggs in a skillet, then setting them aside. Then, you will heat some more oil and sauté the green onions until soft. Next, you will add the rice and stir-fry it until it is hot and slightly browned. Finally, you will add the soy sauce, sesame oil, peas, carrots, and eggs, and toss everything together until well coated.
This fried rice is simple, hearty, and delicious, and it tastes just like the Panda Express version!
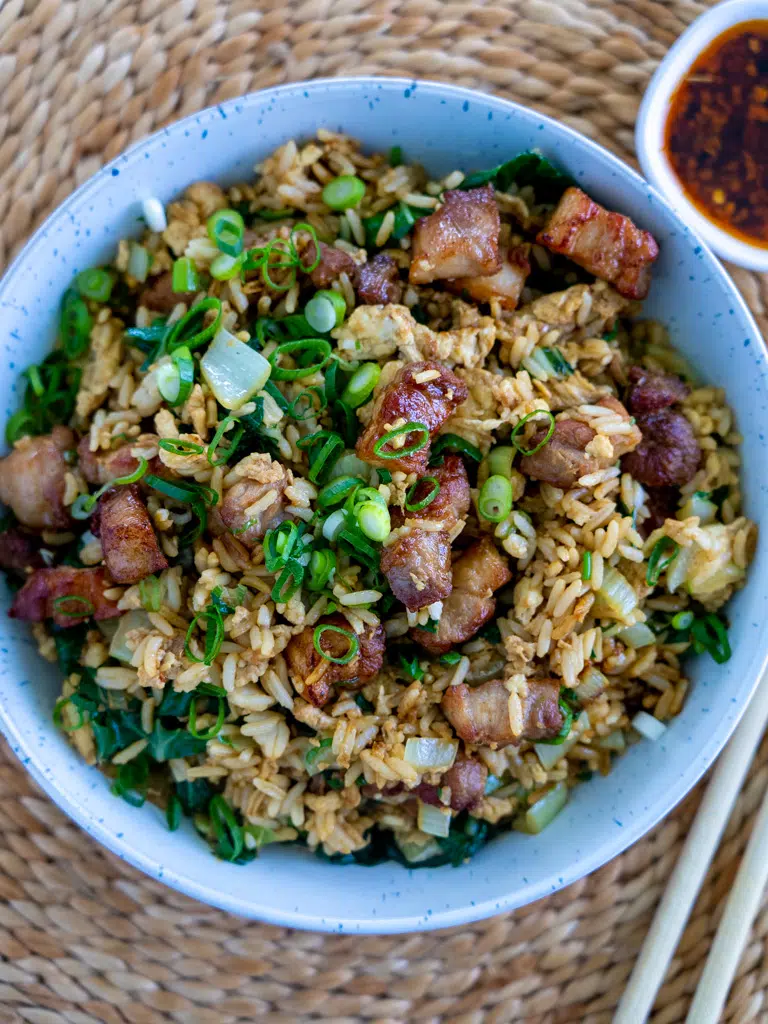
This recipe is from SimpleHomeEdit, and it is a rich and indulgent fried rice that is made with pork belly, eggs, onion, garlic, ginger, soy sauce, sugar, vinegar, and green onions. It is a perfect way to use up any leftover pork belly that you have, and it can be enjoyed as a main dish or a side dish.
The secret to making this fried rice is to use a cast iron skillet or a non-stick pan, so that the pork belly can render its fat and crisp up. You will also need to use cold, cooked rice that has been refrigerated overnight, so that it is dry and separated. You will start by cutting the pork belly into small pieces and frying them in a skillet until they are crispy and golden, then draining them on a paper towel and setting them aside. Then, you will heat some oil and scramble some eggs in the same skillet, then setting them aside as well. Next, you will heat some more oil and sauté the onion, garlic, and ginger until soft and fragrant. Then, you will add the rice and stir-fry it until it is hot and slightly charred. Finally, you will add the soy sauce, sugar, vinegar, green onions, and the pork belly and eggs, and stir everything well.
This fried rice is rich, savory, and satisfying, and it is a great way to enjoy pork belly in a different way.
Click here
I hope you enjoyed these four easy and delicious fried rice recipes that you can make at home. They are all different and unique, and they are all perfect for any occasion. You can also experiment with different ingredients and sauces, and create your own fried rice variations.
If you want to enjoy a warm and delicious meal at work or school, you need to read this guide on how to choose the best electric lunch box for your needs. Click here to find out more! 👇Thank you for reading, and happy cooking! 😊
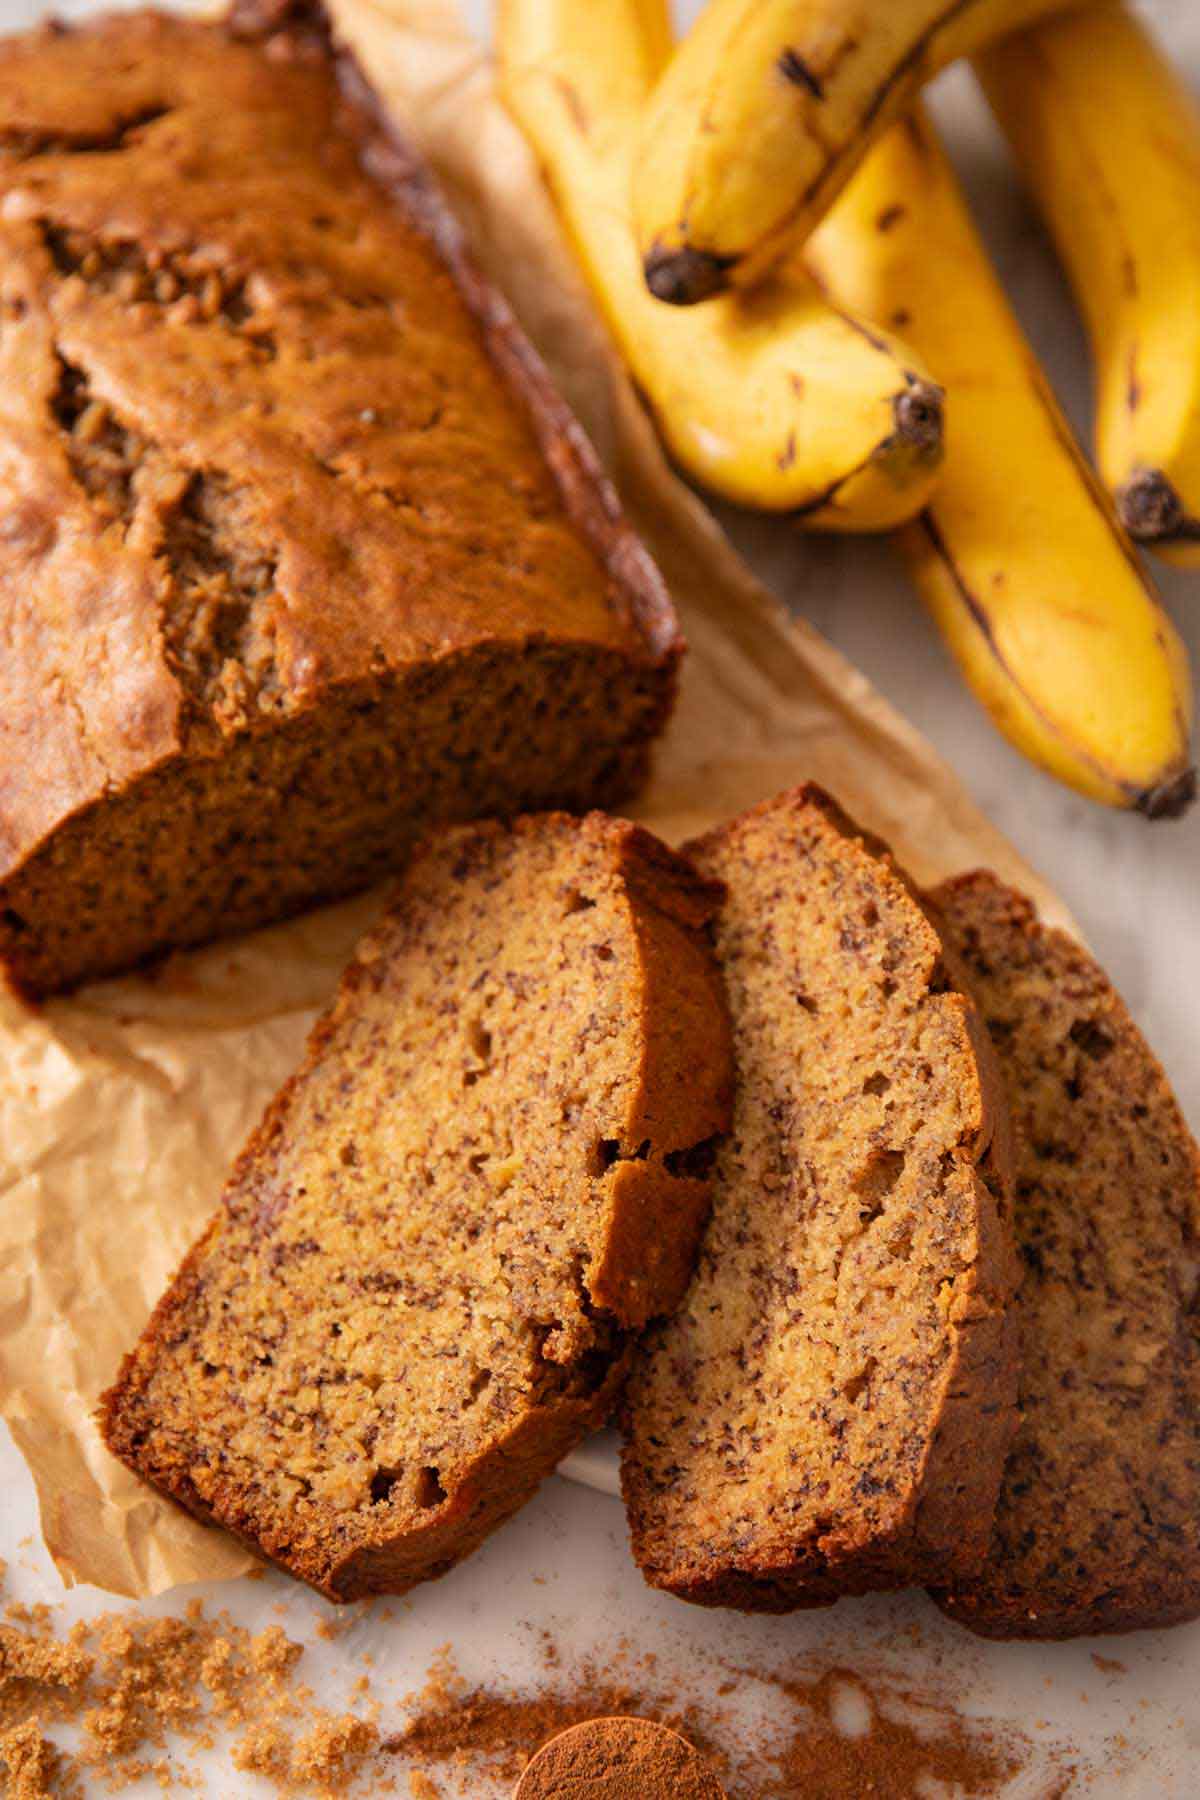
From the classic banana bread recipe to creative twists like the Peanut Butter Cup Banana Bread, this post offers a variety of recipes to suit all tastes and dietary preferences. Whether you’re a baking rookie or a seasoned chef, you’ll find a recipe that’s perfect for you. So why wait? Dive in and discover your new favorite banana bread recipe today!
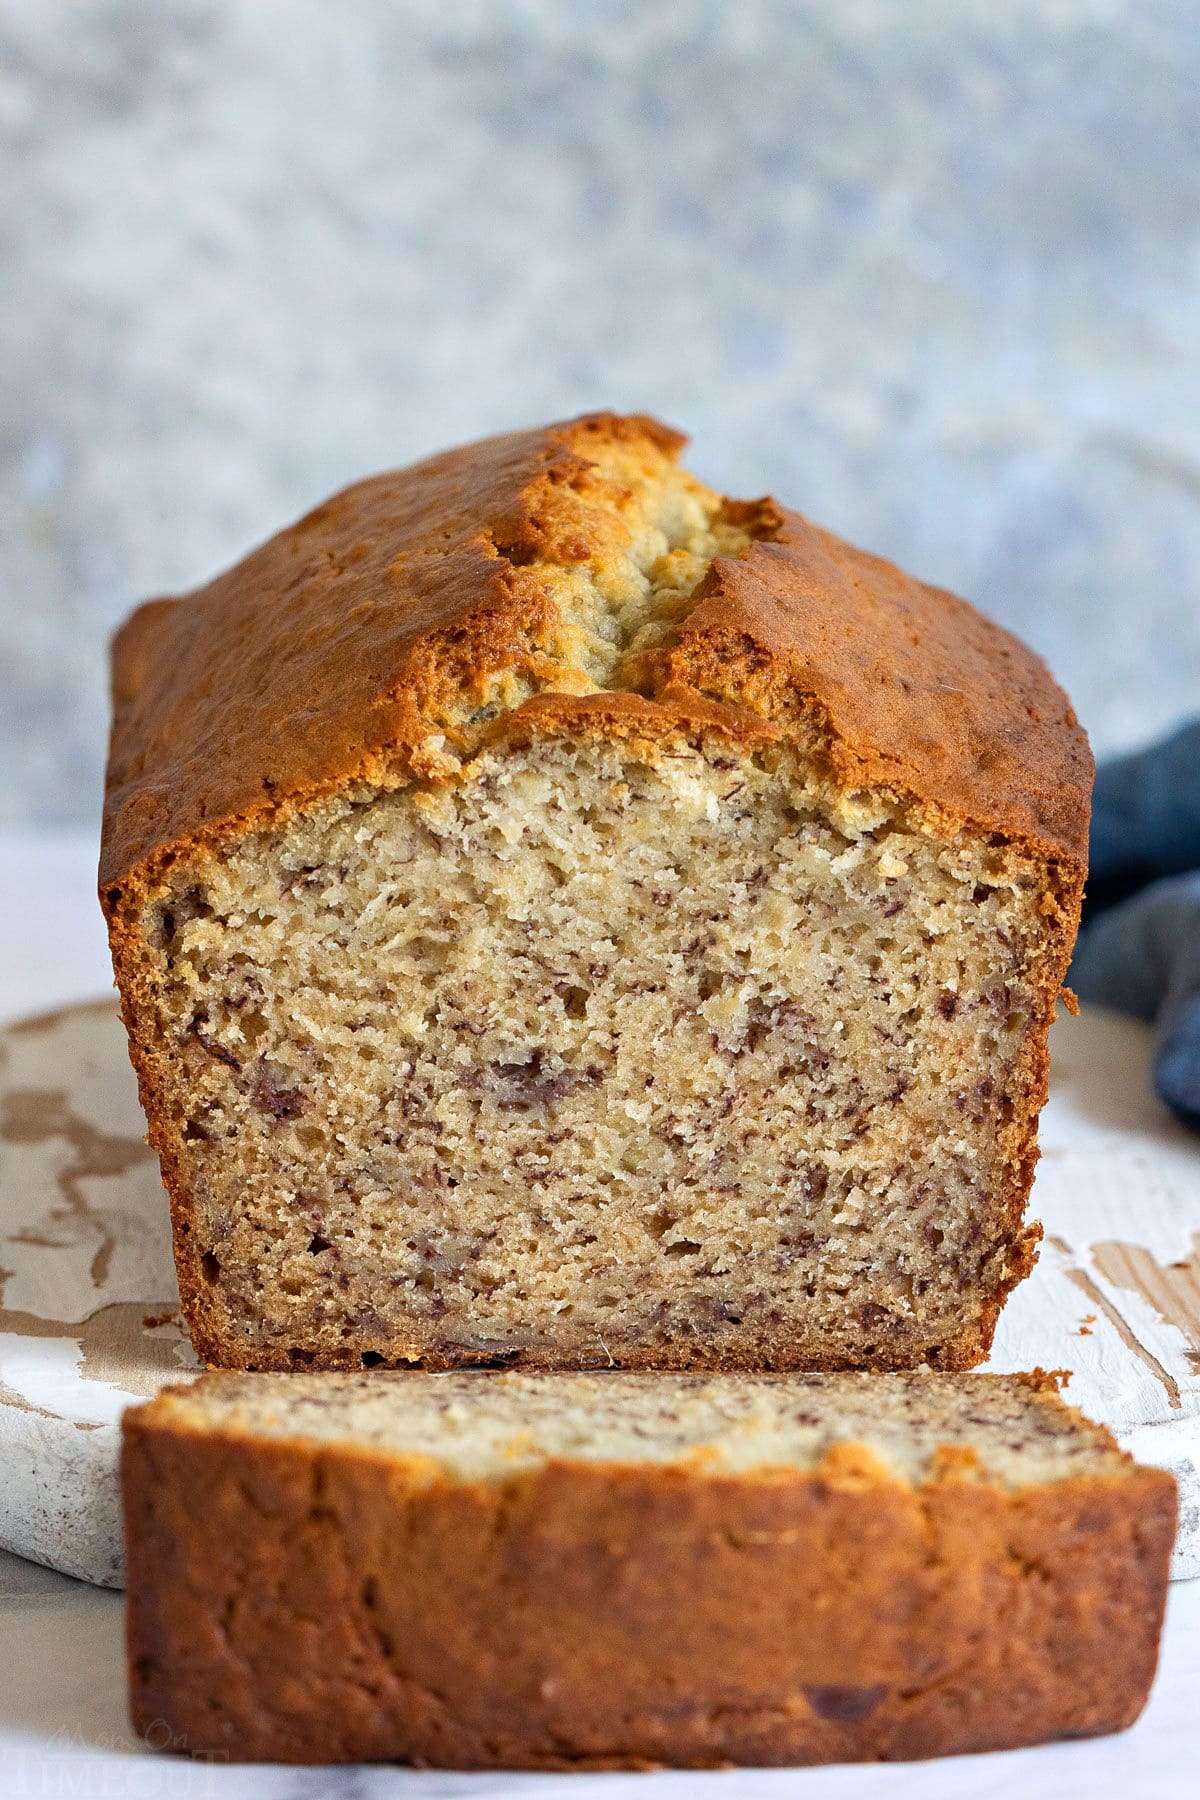
Banana Bread Recipe is a delightful recipe that uses ripe bananas to create a moist and flavorful bread with a hint of cinnamon. It’s an easy-to-follow recipe that’s perfect for using up those overripe bananas on your kitchen counter.
Best Chocolate Chip Banana Bread Recipe is a delicious upgrade to the classic banana bread, featuring melty chocolate chips nestled within banana-infused goodness. The recipe is simple and suitable for both baking rookies and seasoned chefs.
Gluten Free Banana Bread is a simple and delicious one-bowl recipe packed with nourishing ingredients and sweetened only with bananas. It’s gluten-free, grain-free, dairy-free, and paleo-friendly, making it suitable for a wide range of dietary preferences.
Classic Peruvian Banana Bread: Easy Queque De Platano Recipe is a classic Peruvian banana bread made with very ripe bananas or plantains, eggs, butter, flour, and some sugar for extra sweetness. The recipe also suggests adding cinnamon for a sweet-spicy kick and other optional ingredients like pecans, walnuts, raisins, cranberries, apricots, and chocolate.
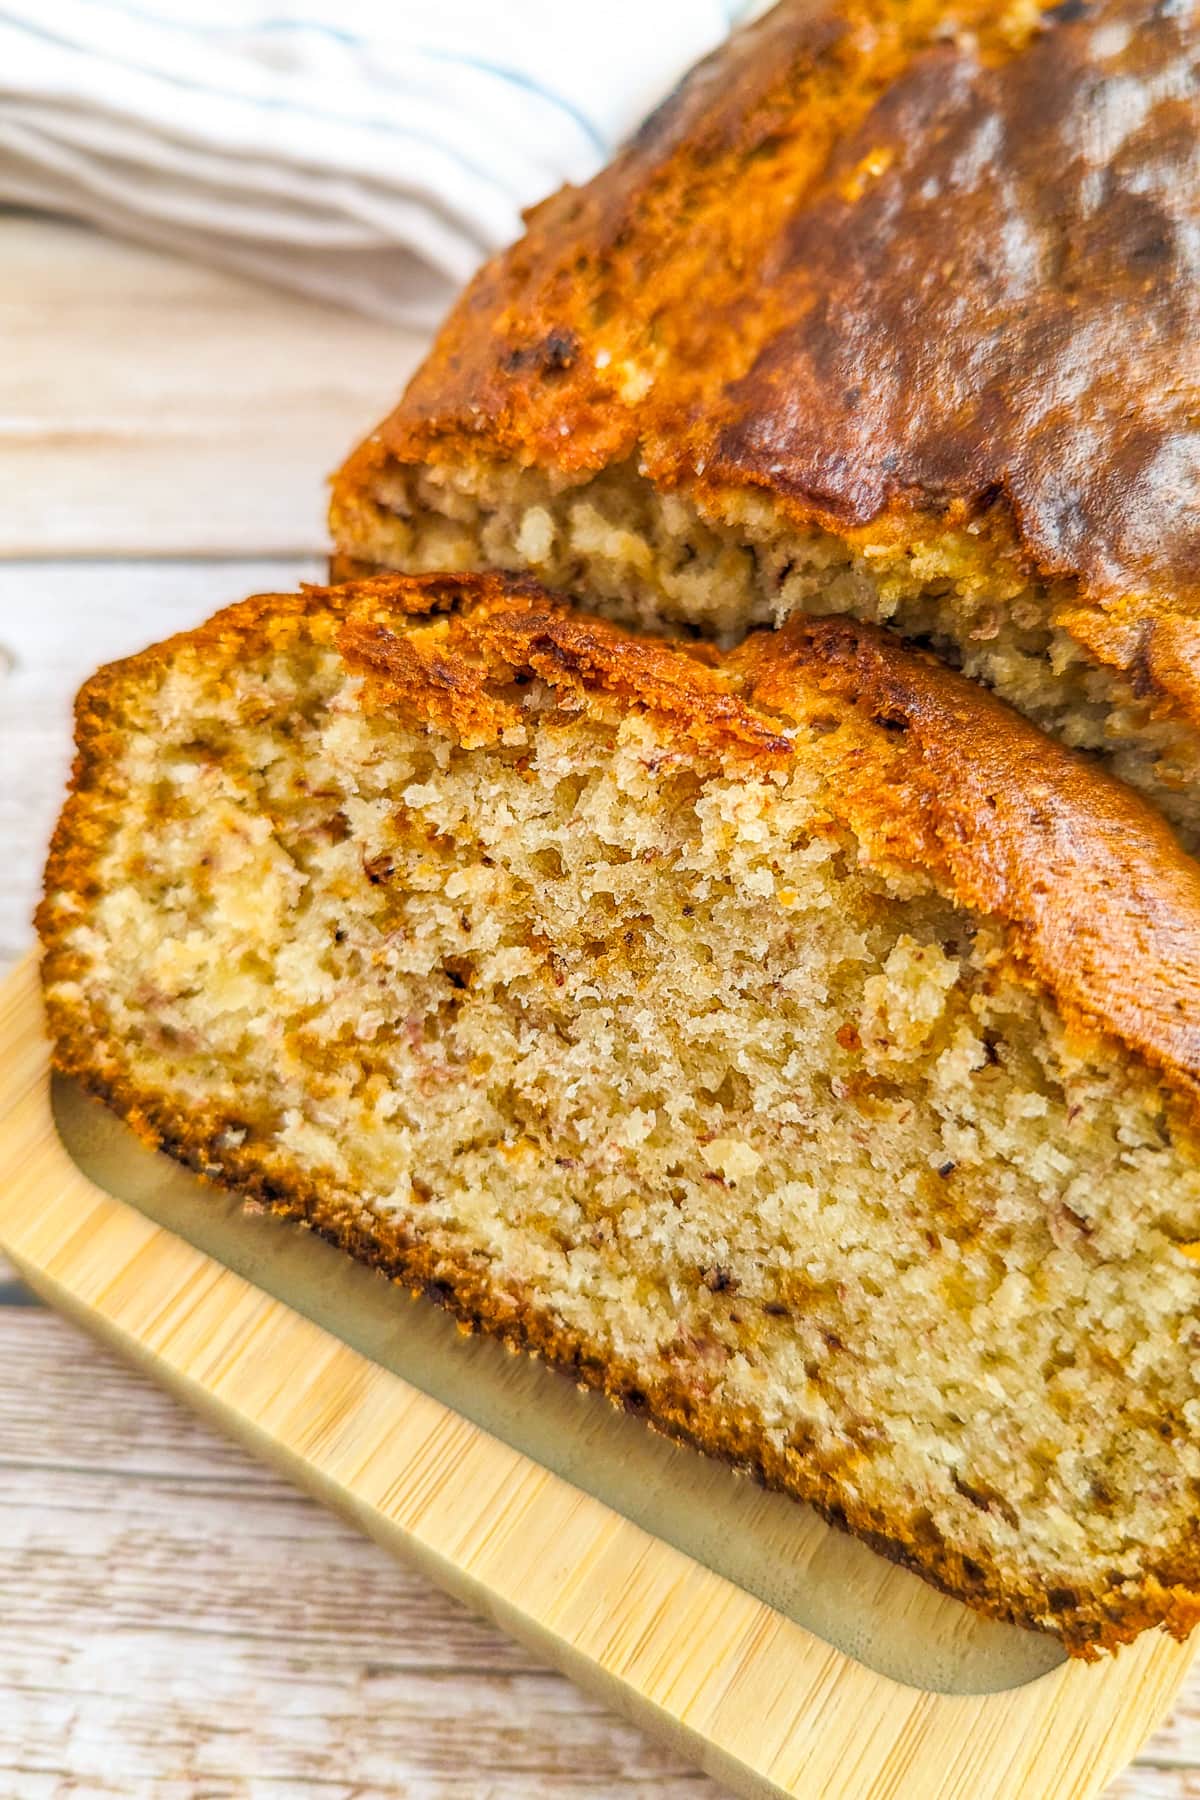
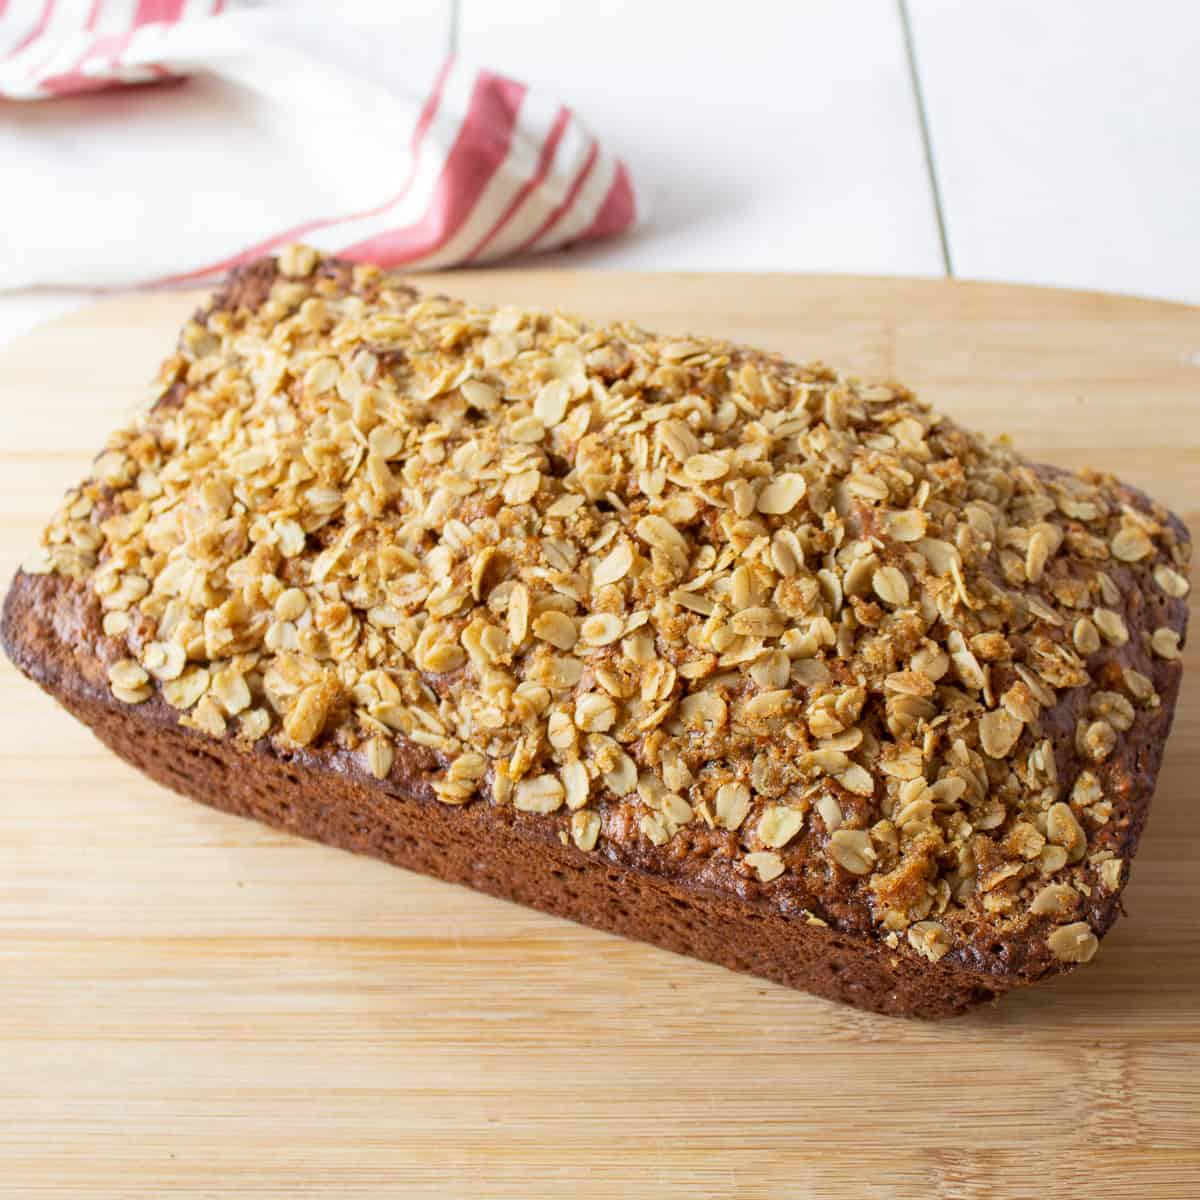
SIMPLY PERFECT BANANA BREAD RECIPE is a moist and hearty loaf of bread with a delicious oatmeal topping. It’s a customizable recipe that uses kitchen staples and ripe bananas.
Nourishing Almond Flour Banana Bread is a simple, one-bowl recipe that’s naturally sweetened with bananas and optionally, chocolate chips. It’s gluten-free, grain-free, dairy-free, and paleo-friendly, making it a great choice for those with specific dietary needs.
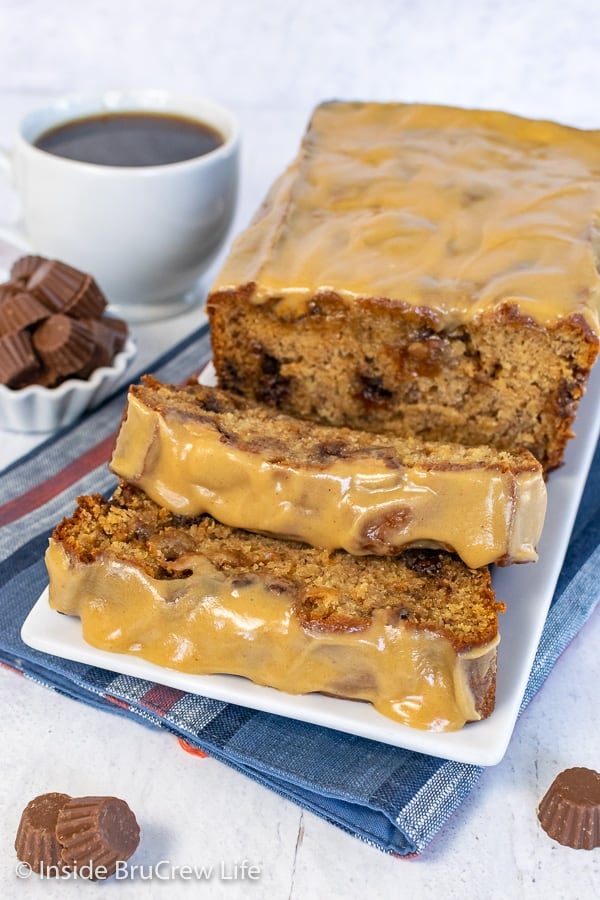
PEANUT BUTTER CUP BANANA BREAD is a unique twist on the classic banana bread, featuring mini peanut butter cups and a peanut butter glaze. It’s a delicious choice for breakfast or a snack and is sure to be a hit with peanut butter lovers.
Oatmeal Banana Bread is a hearty banana bread recipe that incorporates oatmeal in the bread and a tasty oatmeal topping. It’s a quick and easy recipe that’s perfect for using up overripe bananas.
EASY CRANBERRY BANANA NUT BREAD (HOLIDAY RECIPE) is a festive favorite that combines tart cranberries and sweet bananas to create a delicious bread perfect for the holiday season. The recipe is easy to follow and makes a great breakfast or afternoon snack.